
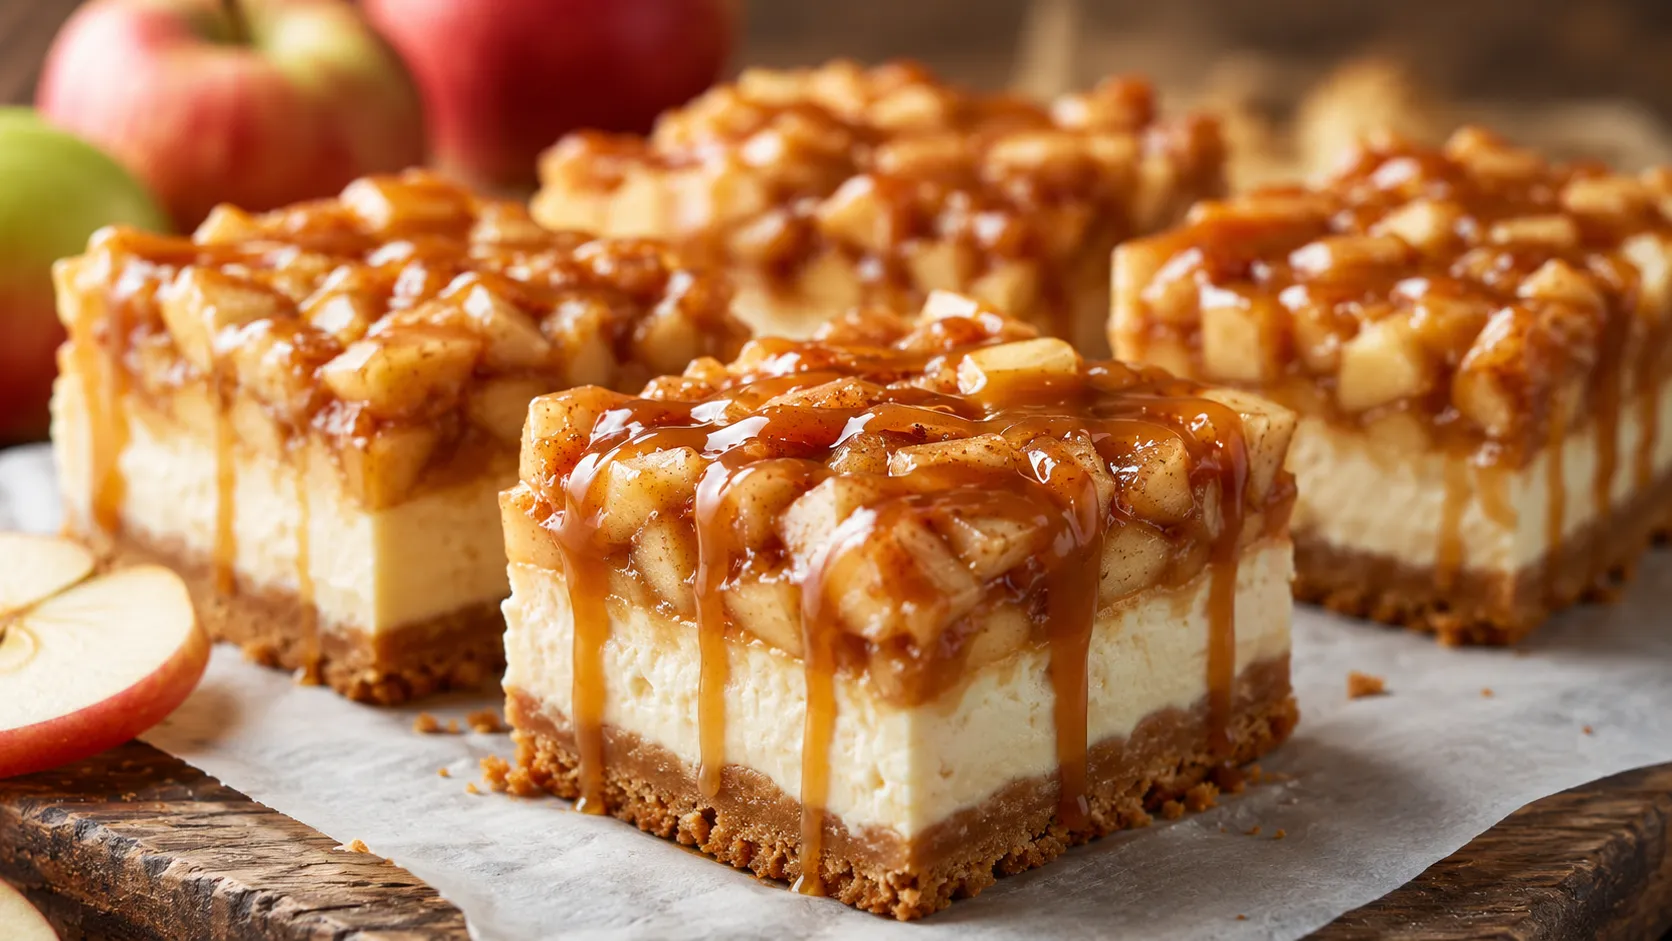
Easy Caramel Apple Cheesecake Bars
I still remember the first time I made these. It was a rainy October afternoon; I had three apples sitting in my fruit bowl that were about two days from turning into applesauce whether I wanted them to or not, and I had a block of cream cheese in the fridge left over from a bagel run. I was not trying to be impressive. I was trying to use up food before it went bad.
What came out of my oven that day was so good that I actually texted a photo to my sister before I’d even cut a slice for myself. That’s how you know a recipe is a keeper — when you can’t wait to brag about it before you’ve even tasted it.
Caramel apple cheesecake bars are basically everything good about fall wrapped into one pan: a buttery graham cracker crust, a thick layer of tangy-sweet cheesecake, cinnamon-spiced apples cooked down until they’re soft and jammy, and a caramel drizzle that pools into every little crack on top. They’re the dessert I bring to potlucks when I want people to ask for the recipe.
Why You’ll Love This Recipe
- No springform pan required — just a regular 9×13 baking dish, so it’s beginner-friendly from the start.
- Make-ahead magic — these actually taste better the next day, which makes them perfect for parties and holidays.
- Sneaky easy — it looks like a bakery dessert, but it’s really just layering three simple components.
- Crowd-pleaser — I have never once had leftovers when I bring these somewhere. Never.
- Budget-friendly — apples, cream cheese, and pantry staples. No fancy ingredients, no special trip to a specialty store.

Ingredients List
For the Crust
- 2 cups graham cracker crumbs (about 16 full sheet crackers, crushed)
- 6 tablespoons unsalted butter, melted
- 3 tablespoons granulated sugar
- Pinch of salt
For the Cheesecake Filling
- 16 oz (two 8 oz blocks) cream cheese, softened to room temperature
- 1/2 cup granulated sugar
- 1 teaspoon vanilla extract
- 2 large eggs
- 1 tablespoon all-purpose flour (this helps prevent cracking — small trick, big difference)
For the Cinnamon Apples
- 2 medium apples, peeled and diced small (I like Granny Smith for tartness, but Honeycrisp works if you want it sweeter)
- 2 tablespoons unsalted butter
- 3 tablespoons brown sugar, packed
- 1 teaspoon ground cinnamon
- 1/4 teaspoon nutmeg
- 1 teaspoon lemon juice (keeps the apples from browning and adds a little brightness)
For the Topping
- 1/2 cup caramel sauce, store-bought or homemade (I usually just grab a jar — no shame in that)
- Extra pinch of flaky sea salt, if you’re into that salted caramel life (I always am)
Substitution note: If you don’t have graham crackers, crushed digestive biscuits or vanilla wafers work in a pinch. And if you’re out of fresh apples, a well-drained cup of apple pie filling will get you there in an emergency — though fresh really is worth it here.
Step-by-Step Instructions
- Preheat and prep (5 minutes): Preheat your oven to 350°F (175°C). Line a 9×13-inch baking pan with parchment paper, leaving a little overhang on the sides so you can lift the whole thing out later. This step feels optional the first time you make it. It is not optional. Trust me.
- Make the crust (10 minutes): Mix the graham cracker crumbs, melted butter, sugar, and salt together in a bowl until it looks like wet sand. Press this firmly into the bottom of your pan — I like using the bottom of a measuring cup to really pack it down evenly. Bake for 8 minutes, then set aside to cool slightly while you make the filling.
- Cook the apples (8-10 minutes). In a skillet over medium heat, melt the butter, then add your diced apples, brown sugar, cinnamon, nutmeg, and lemon juice. Cook, stirring occasionally, until the apples are soft but still hold their shape — about 8 minutes. You want them tender, not mushy. Set aside to cool. If you skip cooling them, they’ll melt right into your cheesecake batter, and you’ll lose that nice apple texture.
- Make the cheesecake filling (5 minutes). Using a stand mixer or hand mixer, beat the softened cream cheese until it’s completely smooth with no lumps — this takes about 2 minutes. Add the sugar and vanilla, and mix until combined. Add the eggs one at a time, mixing just until incorporated after each one. Finally, mix in the flour. Don’t overbeat once the eggs are in, or you’ll add too much air and the bars can puff up and crack.
- Layer everything (5 minutes). Pour the cheesecake filling over your cooled crust and smooth it out evenly. Spoon the cooked apples over the top, spreading them out so every bite gets some. Gently press them in slightly so they nestle into the batter instead of sitting on top.
- Bake (28-32 minutes). Bake until the edges are set, and the center has just a slight jiggle when you nudge the pan — think Jell-O, not liquid. This usually takes 28-32 minutes in my oven, but ovens vary, so start checking at 25.
- Cool completely (this is the hard part). Let the bars cool at room temperature for an hour, then refrigerate for at least 3 hours, or overnight if you can manage the patience. This is genuinely the step people skip and regret. Cheesecake needs the chill time to set up properly and slice cleanly.
- Drizzle and serve: Lift the bars out using your parchment overhang, slice into squares, and drizzle generously with caramel sauce right before serving. Add a pinch of flaky sea salt if you’re feeling fancy.
Pro Tips & Tricks
- Room temperature cream cheese is non-negotiable. Cold cream cheese gives you lumpy batter no matter how hard your mixer works. Leave it out for a solid hour before you start.
- Don’t overbake. The bars will keep cooking a little from residual heat after you pull them out. Pull them when the center still jiggles slightly, not when it’s fully firm.
- Slice with a hot, clean knife. I run mine under hot water, dry it, then cut. Wipe it between cuts. This is the difference between bakery-clean slices and a crumbly mess.
- Make it a day ahead. I actually think these taste better on day two once all the flavors settle together. Perfect for holiday prep when your oven is already fighting for space.
- Storage: Keep them covered in the fridge for up to 5 days. I like storing them in a single layer with parchment between any stacked layers so the caramel doesn’t stick everything together.
Variations & Substitutions
If you want a gluten-free version, just swap the graham crackers for a gluten-free graham cracker or cookie alternative — the rest of the recipe is naturally gluten-free as written (just double-check your caramel sauce label).
Craving something with a little more warmth? Add a pinch of ground ginger and cardamom to the apple mixture along with the cinnamon. It gives the bars a chai-spiced quality that’s incredible around the holidays.
For a nutty twist, sprinkle chopped pecans or walnuts over the apples before baking, or press some into the crust. It adds a nice crunch against the creamy filling that I genuinely can’t stop eating once I’ve tried it.
Serving Suggestions
These bars are rich, so I like serving them slightly chilled with a small scoop of vanilla ice cream melting on top — the temperature contrast is everything. They’re a natural fit for Thanksgiving dessert tables, fall potlucks, or just a Sunday afternoon when you want your kitchen to smell like cinnamon and butter. A mug of hot apple cider or coffee alongside them rounds the whole thing out perfectly.
FAQs
Can I freeze caramel apple cheesecake bars?
Yes. Slice them first, wrap each bar individually in plastic wrap, then store in an airtight container for up to 2 months. Thaw overnight in the fridge before serving, and add the caramel drizzle fresh after thawing.
Why did my cheesecake layer crack?
Cracking usually happens from overbaking or overmixing the batter once the eggs go in. Mix gently after adding eggs, and pull the bars from the oven while the center still has a slight wobble.
Can I use a different fruit instead of apples?
Absolutely — pears work beautifully with the same method, and even fresh peaches in the summer months give a nice twist on the same base recipe.
Do I have to use a water bath?
No. Because this is baked in a regular pan rather than a springform pan, a water bath isn’t necessary here, which is honestly one of my favorite things about this recipe.
Can I make these ahead of time for a party?
Yes, and I’d actually recommend it. Make them up to 2 days ahead and store covered in the fridge. Add the caramel drizzle right before serving so it stays glossy instead of soaking in.
My caramel sauce is too thin, and it’s sliding off. What do I do?
Pop your caramel sauce in the fridge for 10-15 minutes before drizzling, or reduce it slightly on the stove over low heat. A thicker caramel clings to the bars instead of pooling at the bottom of the plate.
Read More Recipes:
- Moist Apple Fritter Bread with Cinnamon Glaze
- Easy Chinese Garlic Noodles in 15 Minutes
- Healthy Cashew Chicken Stir-Fry Recipe
- Homemade Beef Lo Mein Noodles Recipe
- Easy Chinese Chicken and Broccoli Recipe
Final Thoughts
There’s something about the combination of tart apples, creamy cheesecake, and warm caramel that just feels like fall on a plate. I’ve made this recipe more times than I can count now, and it still disappears just as fast every single time.
If you make these, I’d love to hear how they turn out for you — and if you stumble onto your own happy accident along the way, as I did with that first batch, that’s honestly the best part of cooking. Go grab those apples before they go bad. You’ve got this.
Printable Recipe Card
Want just the essential recipe details without scrolling through the article? Get our printable recipe card with just the ingredients and instructions.


