
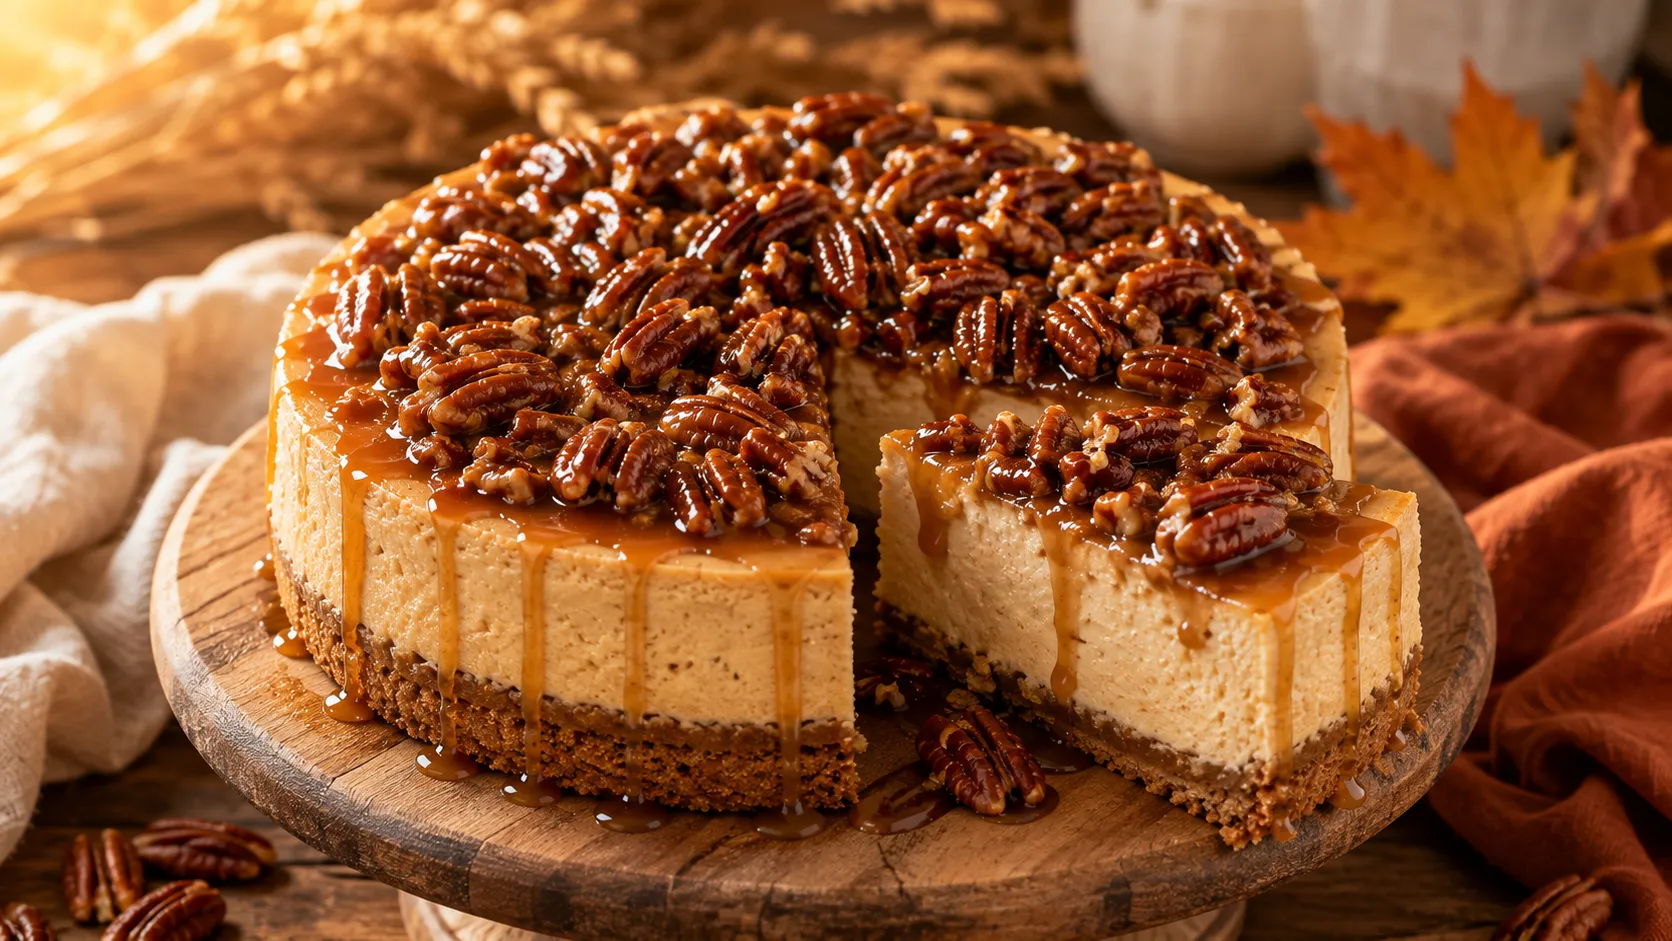
Maple Pecan Cheesecake for Fall
The first time I made this cheesecake, it was for my mother-in-law’s birthday, and I was so nervous about it that I checked the oven light probably forty times. It cracked anyway. Right down the middle, like a tiny canyon, ten minutes after I pulled it out. I almost cried into my dish towel.
That crack turned out to be the best thing that ever happened to my baking, honestly. It sent me down a rabbit hole of water baths and room-temperature eggs and low-and-slow oven times, and somewhere in there I landed on this exact recipe — the one I now make every single October without fail. My kitchen smells like a maple syrup farm for two days afterward, and nobody in my house complains about that even a little.
There’s something about maple and pecans together that just feels like fall wrapped up in a fork. Toasty, sweet, a little bit smoky. Add that to a dense, tangy cheesecake, and you’ve got the dessert people actually remember from your dinner table, not just politely finish.
Why You’ll Love This Recipe
- It tastes like a fancy bakery cheesecake, but it’s genuinely a beginner-friendly recipe once you know the water bath trick.
- Real maple syrup does the heavy lifting — no maple extract, no fake flavor, just honest ingredients.
- Make-ahead friendly. It actually tastes better the next day, which makes it perfect for holiday hosting when you have a hundred other things to cook.
- The candied pecan topping is basically edible confetti — crunchy, sticky, and worth doubling because people will pick at it straight off the tray.
- Crowd-pleaser at every fall gathering — Thanksgiving, Friendsgiving, a random Tuesday when you need a win.
Ingredients You’ll Need
For the Crust
- 2 cups graham cracker crumbs (about 16 full crackers, crushed)
- 1/3 cup finely chopped pecans
- 6 tablespoons unsalted butter, melted
- 3 tablespoons brown sugar
- Pinch of salt
Swap tip: gingersnap cookies instead of graham crackers give the crust a warm, spiced kick that plays really nicely with the maple.
For the Cheesecake Filling
- 4 (8 oz) blocks full-fat cream cheese, softened to true room temperature
- 1 cup packed brown sugar
- 3/4 cup pure maple syrup (grade A amber or dark, not pancake syrup)
- 3 large eggs, room temperature
- 1 egg yolk
- 1/3 cup sour cream
- 2 tablespoons all-purpose flour
- 1 tablespoon vanilla extract
- 1 teaspoon ground cinnamon
- 1/4 teaspoon ground nutmeg
- Pinch of salt
For the Maple Pecan Topping
- 1 1/2 cups pecan halves
- 1/2 cup pure maple syrup
- 2 tablespoons unsalted butter
- 2 tablespoons brown sugar
- Pinch of flaky sea salt
Swap tip: no maple syrup on hand for the topping (though I really encourage you to find some)? Honey works, but you’ll lose some of that distinct maple flavor.
Step-by-Step Instructions
- Make the crust (10 minutes). Preheat your oven to 325°F. Mix the graham cracker crumbs, chopped pecans, melted butter, brown sugar, and salt in a bowl until it looks like wet sand. Press it firmly into the bottom of a 9-inch springform pan, going about half an inch up the sides. I use the flat bottom of a measuring cup to really pack it down — it makes a huge difference in whether your crust holds together when you slice it. Bake for 10 minutes, then set aside to cool while you make the filling.
- Beat the cream cheese (3-4 minutes). In a stand mixer fitted with the paddle attachment (a hand mixer works fine too), beat the softened cream cheese on medium speed until it’s completely smooth with zero lumps. This step matters more than any other — cold cream cheese is the number one reason cheesecakes turn out lumpy. Scrape the bowl down at least twice.
- Add the sugar and maple syrup (2 minutes). Add the brown sugar and maple syrup and beat until fully combined and glossy, scraping the bowl again.
- Add the eggs, one at a time (2 minutes). Add the eggs and egg yolk one at a time, mixing on low speed just until each one disappears into the batter. Overbeating here whips too much air into the batter, and that air is what causes cracking later. Mix on low, and stop as soon as you don’t see streaks.
- Finish the batter (2 minutes). Mix in the sour cream, flour, vanilla, cinnamon, nutmeg, and salt on low speed until just combined. The batter should look silky and pour like a thick pancake batter.
- Set up your water bath. Wrap the outside of your springform pan tightly in two layers of heavy-duty foil, going all the way up the sides. This is non-negotiable — it’s what keeps water from sneaking into your crust. Pour the batter into the cooled crust and smooth the top. Place the springform pan into a larger roasting pan and pour hot water into the roasting pan until it comes about 1 inch up the sides of the springform pan.
- Bake low and slow (65-75 minutes). Bake at 325°F for 65 to 75 minutes. You’re looking for the edges to be set and slightly puffed, while the center still has a gentle jiggle, almost like Jell-O — it should not look liquid. It will finish setting as it cools.
- Cool it down slowly (1 hour, then overnight). Turn the oven off, crack the door open, and let the cheesecake sit inside for an hour. This slow cooldown is the actual secret to no cracks, more than anything else in this recipe. Then remove it, let it come to room temperature on the counter, and refrigerate uncovered for at least 6 hours, ideally overnight.
- Make the pecan topping (10 minutes). In a skillet over medium heat, melt the butter with the maple syrup and brown sugar. Add the pecans and stir constantly for 4-5 minutes until the syrup thickens and coats the nuts and they smell toasty. Pour onto parchment paper, sprinkle with flaky salt, and let cool completely — they’ll crisp up as they sit. Roughly chop or leave whole and pile them on top of the cheesecake right before serving.
Pro Tips & Tricks
- Room temperature everything. Cream cheese, eggs, sour cream — pull them out at least an hour before you start. Cold ingredients don’t blend smoothly, and that’s where lumps come from.
- Don’t skip the water bath, even though it feels fussy. It’s the difference between a creamy, dense cheesecake and a dry, cracked one.
- Resist opening the oven door while it bakes. Every time you open it, the temperature drops and that sudden change causes cracks.
- Make it a day ahead. I actually think this cheesecake tastes better on day two, once the flavors settle. It’s one less thing to worry about on a busy holiday.
- Store leftovers covered in the fridge for up to 5 days, and add the pecan topping fresh each time you serve a slice if you’re making it ahead — it stays crunchier that way.

Variations & Substitutions
If you want a spiced version, add 1/4 teaspoon ground ginger and a pinch of ground cloves to the batter along with the cinnamon and nutmeg — it turns this into more of a pumpkin-adjacent, deep autumn flavor without any actual pumpkin.
For a gluten-free version, swap the graham crackers for gluten-free graham crackers or gluten-free gingersnaps, and make sure your flour swap in the filling is a 1:1 gluten-free blend. The 2 tablespoons of flour is mostly there for structure, so this swap works without any real texture loss.
Want it bourbon-spiked? Add 1 tablespoon of bourbon to the pecan topping while it simmers. It burns off most of the alcohol and leaves behind this warm, boozy caramel note that pairs shockingly well with the maple.
Serving Suggestions
This cheesecake is rich, so I like to serve small slices with a dollop of barely-sweetened whipped cream to cut through it. A hot cup of coffee or spiced chai next to it does wonders too.
It’s the dessert I bring to Thanksgiving instead of pie now (controversial in my family, but nobody’s actually complained), and it disappears just as fast at a casual fall potluck as it does at a holiday table.
FAQs
Can I make this cheesecake ahead of time?
Yes, and I actually recommend it. Make it up to 2 days ahead and keep it covered in the fridge without the topping. Add the pecan topping right before serving so it stays crisp.
Why did my cheesecake crack?
The most common causes are overbeating the batter (too much air), baking at too high a temperature, or a sudden temperature change when it comes out of the oven. The water bath and slow cooldown in this recipe are designed to prevent both.
Can I freeze maple pecan cheesecake?
Yes. Freeze the plain baked cheesecake (without the topping) whole or in slices, wrapped tightly in plastic wrap and then foil, for up to 2 months. Thaw overnight in the fridge and add fresh topping before serving.
Do I have to use a water bath?
You don’t have to, but I wouldn’t skip it if you want a smooth, creamy texture without cracks. If you really want to skip it, place a pan of hot water on the oven rack below the cheesecake to add some moisture to the oven instead.
Can I use a different pan size?
This recipe is built for a 9-inch springform pan. If you only have a 10-inch, your cheesecake will be thinner and will bake faster, so start checking it around 50 minutes.
My cheesecake still looks jiggly after baking — is that normal?
Yes, that’s exactly what you want. A slight wobble in the center, like set Jell-O, means it’s done. It firms up completely as it chills.
Read More Recipes:
- Mini Pumpkin Cheesecakes with Graham Cracker Crust
- No-Bake Pumpkin Spice Cheesecake
- Caramel Pumpkin Cheesecake Bars
- Gluten-Free Pumpkin Spice Cupcakes
- Pumpkin Delight Recipe with Cream Cheese
Final Thoughts
Every time I slide this cheesecake out of the fridge and pile that sticky pecan topping on top, I think about that first cracked attempt at my mother-in-law’s birthday all those years ago. Funny how the recipes that give you the most trouble end up being the ones you make the most.
If you try this one, I’d genuinely love to hear how it turns out for you — and if your first cheesecake cracks too, know that it’s still going to taste incredible. Some of the best desserts I’ve ever eaten weren’t the prettiest ones on the table.


Maple Pecan Cheesecake for Fall
Ingredients
Method
- Preheat oven to 325°F (163°C) and grease a 9-inch springform pan.
- Combine graham cracker crumbs, sugar, and melted butter until evenly moistened.
- Press the crumb mixture firmly into the bottom of the prepared pan.
- Bake the crust for 8 minutes and let it cool slightly.
- Beat the cream cheese until smooth and creamy.
- Mix in maple syrup, brown sugar, vanilla, flour, cinnamon, and salt until well combined.
- Add the eggs one at a time, mixing just until incorporated.
- Fold in the chopped toasted pecans.
- Pour the filling over the cooled crust and smooth the top.
- Bake for 55–60 minutes until the edges are set and the center has a slight jiggle.
- Cool completely at room temperature, then refrigerate for at least 5 hours or overnight.
- Garnish with whipped cream, extra toasted pecans, and a drizzle of maple syrup before serving.
Notes
- Use pure maple syrup for the richest flavor.
- Toast the pecans before adding them for extra crunch and aroma.
- Avoid overmixing after adding the eggs to help prevent cracks.
- Chill overnight for the best texture and flavor.
- Store covered in the refrigerator for up to 5 days.
DID YOU MAKE THIS EASY RECIPE?
If you have, then share it with us by sending a photo. We’re excited to see what you've made:-)Printable Recipe Card
Want just the essential recipe details without scrolling through the article? Get our printable recipe card with just the ingredients and instructions.


