
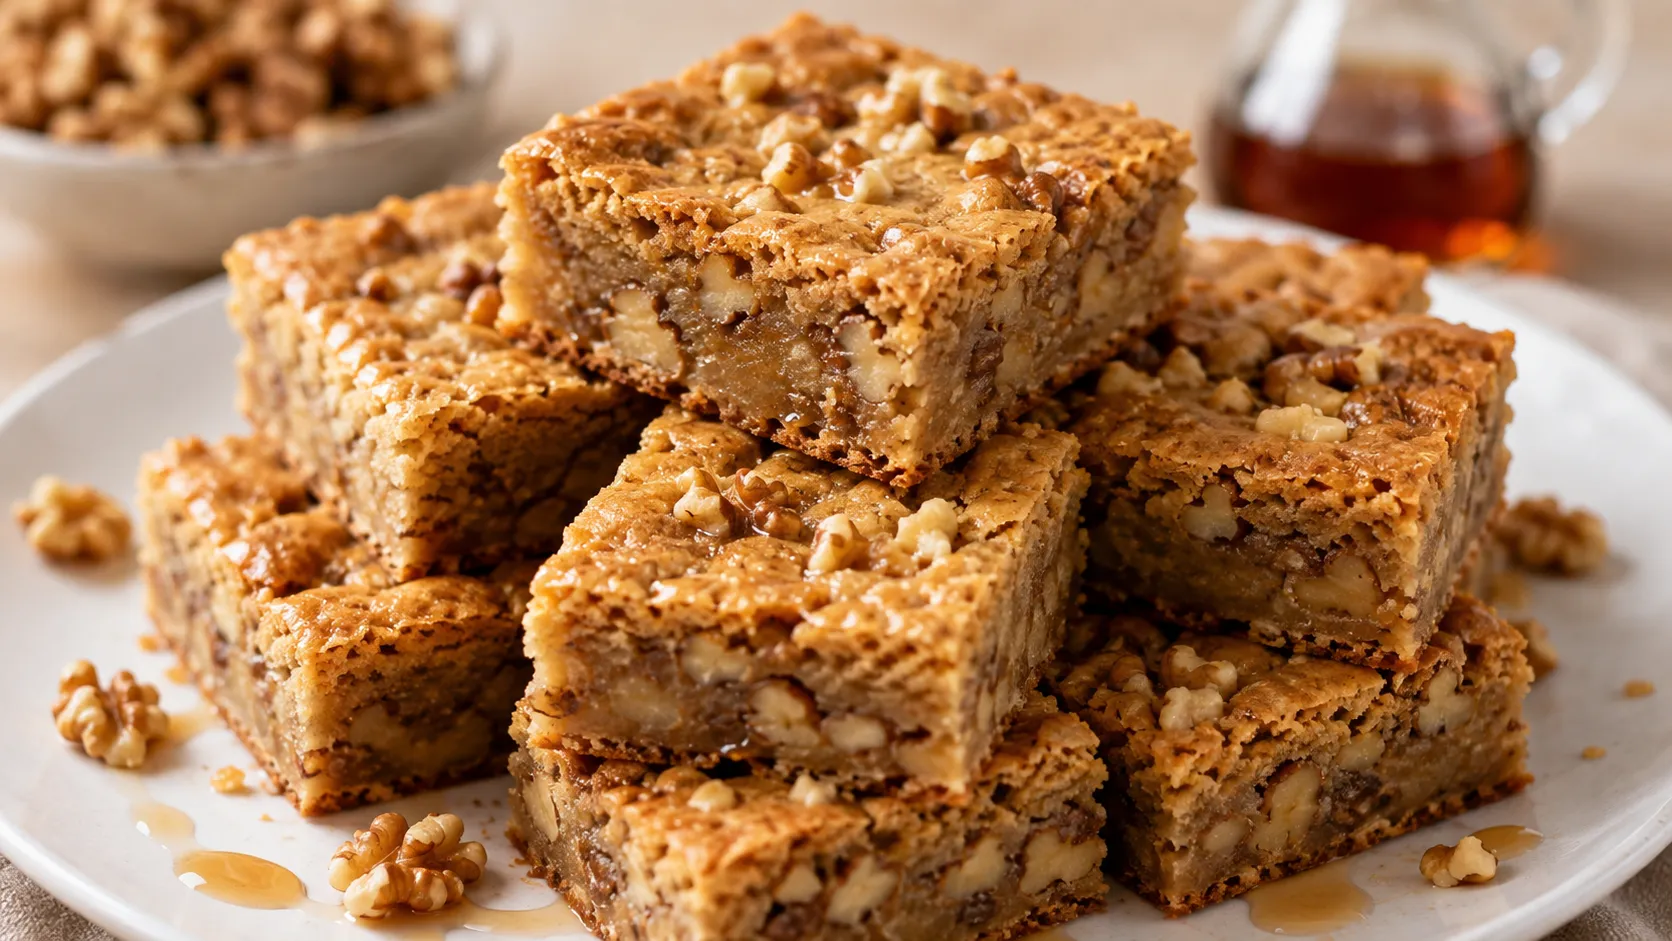
Maple Walnut Blondies (The Recipe I Make Every Time It Rains)
There’s a walnut tree in my parents’ backyard that drops nuts all over the lawn every October, and my dad still refuses to cut it down even though it’s basically a hazard to the lawnmower. Every fall, my mom would send us kids out with a bucket to collect the good ones before the squirrels got to them, and by the time we came back inside, freezing and sticky-fingered, she’d already have a pot of maple syrup warming on the stove for pancakes the next morning.
I don’t know exactly when the walnuts and the maple syrup ended up in the same pan together, but once they did, there was no going back. Maple walnut blondies became the thing I baked on the first genuinely cold day of the year, the smell that meant socks and flannel and staying inside. I’ve made this recipe more times than I can count now, and it’s gone through at least four “final” versions before I landed on the one I’m sharing with you today.
The first time I made these, I used pancake syrup instead of real maple syrup because that’s what was in the pantry, and honestly? They tasted like sugar cookies with an identity crisis. Real maple syrup isn’t optional here — it’s the whole point. Once I switched over, everything clicked.
Why You’ll Love This Recipe
- One bowl, no mixer required — you really can make these with just a whisk and a wooden spoon.
- Ready in under 45 minutes, start to finish, including bake time.
- Chewy in the middle, slightly crisp on the edges — the exact texture a good blondie should have.
- Budget-friendly — no fancy chocolate or specialty flours, just pantry staples plus walnuts and maple syrup.
- Freezer-friendly, so you can stash a batch away and pull out a square whenever the craving hits.
Ingredients You’ll Need
Here’s what’s going into the pan. I always measure my butter and syrup by weight when I can, but cup measurements work fine too.
For the blondie base:
- 1 cup (2 sticks) unsalted butter, melted and slightly cooled
- 1 cup packed light brown sugar
- 1/2 cup pure maple syrup (Grade A amber or dark — dark has more flavor, and I usually reach for it)
- 2 large eggs, room temperature
- 2 teaspoons vanilla extract
- 2 1/4 cups all-purpose flour
- 1 teaspoon baking powder
- 1/2 teaspoon baking soda
- 3/4 teaspoon salt (I use fine sea salt)
- 1/2 teaspoon ground cinnamon (optional, but it plays so nicely with the maple)
For the walnuts and topping:
- 1 1/2 cups walnuts, roughly chopped, divided
- 2 tablespoons maple syrup, for brushing on top after baking
- Flaky sea salt, for finishing
Substitution notes: If you’re out of light brown sugar, dark brown sugar works fine — you’ll just get a slightly deeper, more molasses-forward flavor. Pecans can stand in for walnuts if that’s what you have, though the flavor shifts a bit sweeter. And if you only have salted butter, just cut the added salt down to 1/2 teaspoon.

Step-by-Step Instructions
- Preheat your oven and prep the pan (5 minutes). Preheat your oven to 350°F (175°C). Line a 9×13-inch baking pan with parchment paper, leaving a little overhang on the sides so you can lift the whole thing out later. Trust me on the overhang — I skipped it once and spent ten minutes fighting with a spatula.
- Toast the walnuts (5-7 minutes). Spread the walnuts on a dry baking sheet and toast them in the oven for about 5 to 7 minutes, until they smell nutty and toasty. Keep an eye on them — walnuts go from perfect to burnt fast. Let them cool slightly, then set aside. This step is optional but genuinely makes a difference; raw walnuts taste flat by comparison.
- Mix the wet ingredients (3 minutes). In a large bowl, whisk together the melted butter, brown sugar, and maple syrup until smooth and glossy. Add the eggs one at a time, whisking well after each, then stir in the vanilla. The mixture should look a little like caramel at this point — thick, shiny, and pourable.
- Add the dry ingredients (2 minutes). Sprinkle the flour, baking powder, baking soda, salt, and cinnamon (if using) over the wet mixture. Fold everything together with a spatula or wooden spoon just until no dry streaks remain. Don’t overmix here — a few lumps are fine, and overmixing is what makes blondies turn out tough instead of chewy.
- Fold in the walnuts (1 minute). Set aside about 1/4 cup of the toasted walnuts for the top. Fold the rest into the batter.
- Spread and bake (25-28 minutes). Pour the batter into your prepared pan and spread it into an even layer — it’ll be thick, almost like cookie dough, so use a spatula to push it into the corners. Scatter the reserved walnuts over the top. Bake for 25 to 28 minutes, until the edges are golden brown and just starting to pull away from the sides of the pan, and the center looks set but still slightly soft. A toothpick inserted in the middle should come out with a few moist crumbs, not wet batter.
- Brush with maple syrup and cool (20 minutes). As soon as the blondies come out of the oven, brush the top with the remaining 2 tablespoons of maple syrup while they’re still hot — it soaks in slightly and gives you that shiny, sticky top. Sprinkle with flaky sea salt. Let the pan cool completely on a wire rack before cutting, about 20 minutes, or the blondies will be too soft to slice cleanly.
Pro Tips & Tricks
- Don’t skip the flaky salt. I resisted this for years thinking it was a chef-y gimmick, and then I tried it and understood immediately. The salt cuts through the sweetness and makes the maple flavor pop.
- Underbake slightly rather than overbake. Blondies firm up a lot as they cool, so if you wait for the center to look fully set in the oven, you’ll end up with dry, cakey squares. Pull them when the center still looks slightly underdone.
- Let them cool all the way before cutting. I know it’s hard. I have cut into a warm pan more times than I’d like to admit and ended up with a crumbly mess instead of clean squares. Patience pays off here.
- Store them properly. Keep leftovers in an airtight container at room temperature for up to 4 days, or in the fridge for up to a week. They also freeze beautifully — more on that below.
- Use real maple syrup, not pancake syrup. I mentioned this already, but it’s worth repeating because it makes or breaks the whole recipe. Imitation syrup is mostly corn syrup and doesn’t have the depth this recipe needs.
Variations & Substitutions
If you want a brown butter version, melt your butter in a saucepan over medium heat and let it cook for a few extra minutes, swirling occasionally, until it turns golden brown and smells nutty. Let it cool before using — this adds a toasty, almost caramelized flavor that pairs incredibly well with the maple.
For a gluten-free version, swap the all-purpose flour for a 1:1 gluten-free baking blend. I’ve had good luck with this using King Arthur’s Measure for Measure flour — the texture stays nearly identical.
If you want to lean into fall a little harder, try a spiced version by adding 1/4 teaspoon each of ground nutmeg and ginger along with the cinnamon. It turns these into something that tastes like a cross between a blondie and a spice cookie, which I am fully in support of.
Serving Suggestions
These are perfect on their own with a cup of coffee or a glass of cold milk, but if you want to dress them up, warm a square slightly and top it with a small scoop of vanilla ice cream — the contrast of warm, chewy blondie and ice cream is one of my favorite combinations.
They also travel well, which makes them a great pick for potlucks, school bake sales, or a Thanksgiving dessert table alongside pie. I’ve brought these to more than one holiday gathering and come home with an empty pan every time.
FAQs
Can I use walnut oil instead of butter?
I wouldn’t recommend it. Butter gives blondies their structure and that classic chewy texture — walnut oil would make the batter too loose and change the bake time unpredictably.
How do I know when the blondies are done?
Look for golden brown edges that are just starting to pull away from the pan, and a center that looks set but slightly soft. A toothpick should come out with a few moist crumbs clinging to it, not wet batter.
Can I make these ahead of time?
Yes. You can bake them a day or two in advance and store them covered at room temperature — the flavor actually deepens a bit overnight as the maple settles in.
Can I freeze maple walnut blondies?
Definitely. Cut them into squares, wrap each one individually in plastic wrap, and store in a freezer bag for up to 3 months. Thaw at room temperature for about an hour, or microwave for 15-20 seconds if you want them warm.
My blondies came out cakey instead of chewy. What went wrong?
This usually comes down to overmixing the batter or overbaking. Mix the dry ingredients in just until combined, and pull the pan out of the oven while the center still looks slightly underdone — it’ll finish setting as it cools.
Can I halve this recipe?
Yes, just use an 8×8-inch pan instead of a 9×13, and start checking for doneness around the 20-minute mark since the smaller pan will bake a bit faster.
Read More Recipes:
- Pumpkin Milk Tarts with Cinnamon
- Homemade Caramel Apple Dump Cake
- Pumpkin Bread Pudding with Vanilla Sauce
- Easy Cinnamon Apple Cheesecake Cups
- Maple Pecan Cheesecake for Fall
Give Them a Try
If you make these, I hope they end up becoming your own version of a first-cold-day tradition, the way they did for me. There’s something about the smell of maple and toasted walnuts filling up the kitchen that just makes a house feel warmer.
Let me know how yours turn out, and if you tweak anything along the way — I’m always curious what other people discover by accident, the way I stumbled onto brushing the tops with extra syrup. Happy baking.


Maple Walnut Blondies Recipe
Ingredients
Method
- Preheat the oven to 350°F (175°C) and line an 8×8-inch baking pan with parchment paper.
- Whisk the melted butter and brown sugar together until smooth.
- Add the maple syrup, egg, and vanilla extract and whisk until well combined.
- In a separate bowl, combine the flour, baking powder, salt, and cinnamon.
- Gradually add the dry ingredients to the wet mixture and stir just until combined.
- Fold in the chopped walnuts evenly.
- Spread the batter into the prepared pan and smooth the top.
- Sprinkle additional chopped walnuts over the surface if desired.
- Bake for 23–27 minutes, until the edges are golden and the center is just set.
- Let the blondies cool completely in the pan before slicing into squares.
- Drizzle with additional maple syrup before serving if desired.
Notes
- Use pure maple syrup rather than pancake syrup for the best maple flavor.
- Do not overbake; slightly underbaked centers create soft and chewy blondies.
- Toast the walnuts beforehand for a deeper, nuttier flavor.
- Allow the blondies to cool completely for cleaner slices.
- Store in an airtight container at room temperature for up to 4 days or refrigerate for up to 1 week.
DID YOU MAKE THIS EASY RECIPE?
If you have, then share it with us by sending a photo. We’re excited to see what you've made:-)Printable Recipe Card
Want just the essential recipe details without scrolling through the article? Get our printable recipe card with just the ingredients and instructions.


