
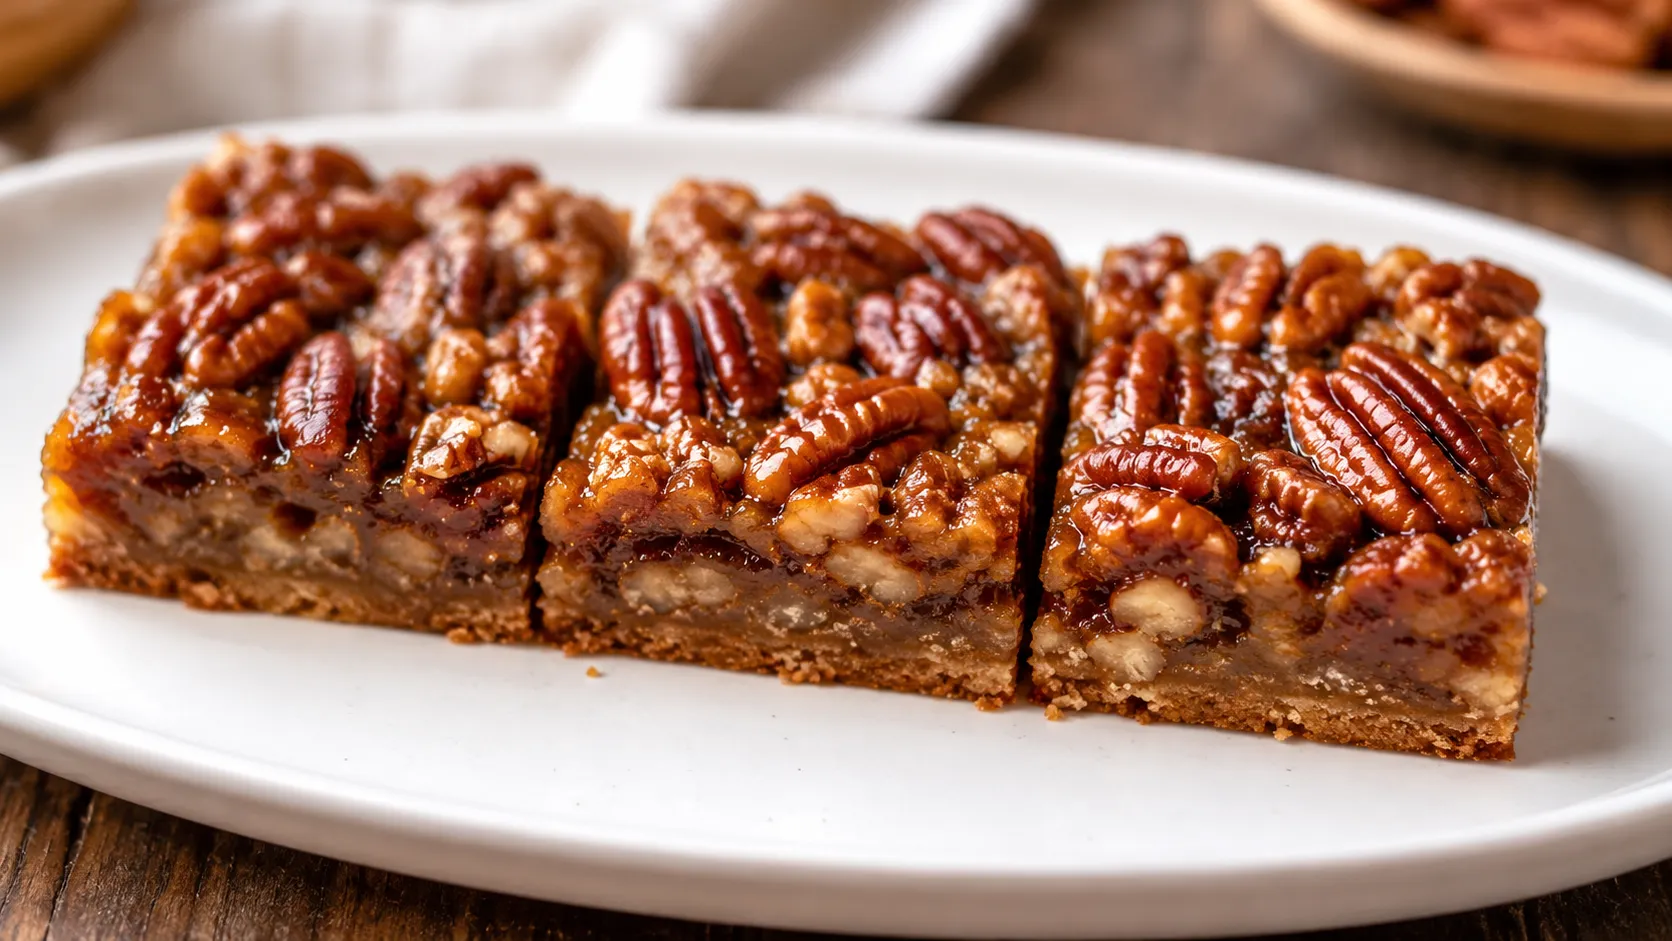
Easy Paleo Pecan Pie Bars
My sister went paleo two Thanksgivings ago, and I panicked a little. She’s the one who always shows up early to help me cook, taste-testing everything along the way, and suddenly half of what I make was off-limits for her. I watched her politely pass on the pecan pie that year, and something about that felt wrong. Pecan pie was supposed to be for everyone at that table.
So I spent the next few weekends testing versions with almond flour, coconut sugar, and maple syrup instead of the usual suspects. My first batch turned out more like a sad, crumbly sand castle than a dessert. My second batch stuck to the pan so badly I nearly threw the whole tray away.
By the fourth try, I finally cracked it — a chewy, gooey pecan pie bar that happens to be paleo, and that my sister now requests by name every single year. Even my nephew, who has zero dietary restrictions and very strong opinions about dessert, asks for these over the “regular” pecan pie now.
Why You’ll Love This Recipe
- No refined sugar, grains, or dairy — made entirely with paleo-friendly pantry staples.
- Naturally gluten-free thanks to a simple almond flour crust, no flour blends or gums needed.
- Still tastes like the pecan pie you grew up with — rich, gooey, and packed with toasted pecan flavor.
- One bowl for the crust, one bowl for the filling — minimal cleanup, maximum payoff.
- Great for mixed dietary tables — nobody has to eat a separate, sad dessert.
Ingredients List
For the Almond Flour Crust
- 2 cups blanched almond flour (not almond meal — the finer texture matters here)
- 3 tablespoons melted coconut oil
- 2 tablespoons maple syrup
- ¼ teaspoon salt
- ¼ teaspoon baking soda
Substitution tip: If you can’t find blanched almond flour, almond meal will still work, but the crust will be a bit denser and less delicate.
For the Pecan Filling
- ¾ cup maple syrup
- ¼ cup coconut sugar, packed
- 3 tablespoons melted coconut oil (or ghee if you tolerate dairy)
- 2 large eggs
- 1 tablespoon vanilla extract
- ¼ teaspoon salt
- 2 ½ cups pecan halves or pieces, lightly toasted
A note on maple syrup: use real maple syrup here, not pancake syrup. Real maple syrup has the depth and slight bitterness that balances out the sweetness — pancake syrup just tastes flat and one-note.

Step-by-Step Instructions
Step 1: Prep Your Pan (2 minutes)
Preheat your oven to 350°F (175°C). Line an 8×8-inch baking pan with parchment paper, leaving overhang on two sides so you can lift the bars out easily later. This is especially important with a paleo crust, since it’s more delicate than a traditional shortbread base.
Step 2: Mix the Crust Dough (5 minutes)
In a medium bowl, stir together the almond flour, melted coconut oil, maple syrup, salt, and baking soda until it forms a thick, slightly sticky dough. It should feel like soft cookie dough — if it feels too wet to press, pop it in the fridge for 10 minutes to firm up.
Step 3: Press and Pre-Bake the Crust (12–14 minutes)
Press the dough evenly into the bottom of your lined pan using damp fingers or the back of a spoon (dampening your hands keeps the dough from sticking to you instead of the pan). Bake for 12–14 minutes, until the edges turn a light golden brown. Almond flour browns faster than regular flour, so keep an eye on it after the 10-minute mark.
Step 4: Toast the Pecans (5 minutes)
While the crust bakes, toast your pecans in a dry skillet over medium heat, stirring frequently, until fragrant and slightly darker in color — about 4–5 minutes. Pull them off the heat right when you start to smell that toasty, nutty aroma; they burn fast once they get going.
Step 5: Make the Filling (5 minutes)
In a bowl, whisk together the maple syrup, coconut sugar, melted coconut oil, eggs, vanilla, and salt until smooth and well combined. Stir in the toasted pecans until they’re fully coated in that glossy syrup mixture.
Step 6: Bake the Bars (25–28 minutes)
Pour the pecan filling over the pre-baked crust, spreading it out evenly so the pecans cover the whole surface. Bake for 25–28 minutes, until the filling is set around the edges with just a slight jiggle left in the center, similar to a just-baked custard.
Step 7: Cool Completely (At least 2 hours)
Let the bars cool fully at room temperature, then refrigerate for at least an hour before slicing. This step matters even more with a paleo crust since almond flour needs that extra chill time to firm up and hold its shape when cut.
Step 8: Slice and Serve
Lift the bars out using the parchment overhang and transfer to a cutting board. Use a sharp knife, wiping the blade clean between cuts, for the neatest squares.
Pro Tips & Tricks
- Use blanched almond flour, not almond meal, if you can. I made this mistake early on, and the coarser almond meal gave the crust a gritty texture instead of that soft, sandy-crumb bite.
- Dampen your hands before pressing the crust. This one trick I stumbled onto by accident, and it completely solved my sticking problem — the dough releases from your fingers instead of clumping onto them.
- Don’t rush the cooling time. Almond flour crusts are more fragile than wheat-based ones, and slicing too early is the fastest way to end up with crumbly, broken bars instead of clean squares.
- Store them cold. Keep the bars in an airtight container in the fridge for up to 5 days — they hold their texture much better chilled than at room temperature.
- Double the batch for gatherings. These disappear fast, and a single 8×8 pan only yields about 16 small bars.
Variations & Substitutions
If you want a vegan version, swap the eggs for a flax egg (1 tablespoon ground flaxseed mixed with 2.5 tablespoons water per egg, left to sit for 5 minutes). The texture turns out slightly softer, but the flavor holds up beautifully.
For a spiced version, add ½ teaspoon of cinnamon and a pinch of nutmeg to the filling. It adds this warm, cozy note that makes these feel extra suited for a fall or winter table.
Want a nut-free crust? Swap the almond flour for a 1:1 sunflower seed flour — just note that sunflower seed flour can react with baking soda, turning the crust slightly green. It’s totally harmless, just a little surprising the first time you see it.
Serving Suggestions
These bars are naturally rich, so a small square goes a long way. I like them slightly chilled, maybe with a scoop of coconut milk ice cream if you’re keeping the whole spread paleo-friendly.
They fit right in at a Thanksgiving or Christmas dessert table, but they also travel well for potlucks or as an easy make-ahead treat when you know you’ll have guests with different dietary needs.
FAQs
Can I make these paleo pecan pie bars ahead of time?
Yes, and I’d actually recommend it. Make them up to 2 days ahead and store covered in the fridge — the flavor deepens, and the texture sets even better after a day of chilling.
Can I freeze paleo pecan pie bars?
You can. Once fully cooled and sliced, freeze them in a single layer, then transfer to an airtight container with parchment between layers. They’ll keep for up to 2 months — thaw overnight in the fridge before serving.
Why did my crust turn out crumbly instead of holding together?
This usually happens if the crust wasn’t pressed down firmly enough, or if it was sliced before fully chilling. Give it the full 2 hours (or overnight) in the fridge before cutting for the cleanest bars.
Can I use a different sweetener instead of coconut sugar?
Yes, brown sugar works if you’re not strictly following paleo guidelines. Just know the flavor will be slightly different — coconut sugar has a deeper, almost caramel-like taste compared to regular brown sugar.
What if my filling doesn’t set after baking?
Give it the full cooling and chilling time before judging it — the filling firms up significantly as it cools. If it’s still noticeably runny after a few hours in the fridge, it likely needed an extra 3–5 minutes in the oven next time.
Are these bars actually paleo, or just “paleo-ish”?
They’re made with paleo-approved ingredients throughout — almond flour, coconut oil, coconut sugar, and maple syrup, with no grains, dairy, or refined sugar. As always, if you’re following paleo for specific health reasons, double-check that all your particular brands fit your needs.
Read More Recipes:
- Delicious Chewy Pecan Pie Bars Recipe
- Easy Pecan Pie Cheesecake Recipe
- Butter Pecan Praline Poke Cake
- Homemade Cranberry Bliss Bars Recipe
- Maple Walnut Blondies
Final Thoughts
These paleo pecan pie bars started as a fix for one holiday problem and turned into one of my most-requested desserts, dietary restrictions or not. There’s something satisfying about a treat that everyone at the table can actually enjoy together.
If you try these, I’d love to hear how they turn out for you, or what little tweaks you make along the way. Leave a comment and let me know — and give that damp-hands trick a shot when you press the crust. It really does make all the difference.


Easy Paleo Pecan Pie Bars
Ingredients
Method
- Preheat the oven to 350°F (175°C) and line an 8×8-inch baking pan with parchment paper.
- Combine almond flour, coconut flour, maple syrup, melted coconut oil, vanilla, and salt until a soft dough forms.
- Press the crust mixture evenly into the bottom of the prepared pan.
- Bake the crust for 10–12 minutes, until lightly golden.
- Whisk together maple syrup, coconut sugar, melted coconut oil, eggs, vanilla, cinnamon, and sea salt until smooth.
- Stir the pecans into the filling mixture.
- Pour the pecan mixture evenly over the warm crust.
- Bake for 23–25 minutes, until the filling is set around the edges and slightly soft in the center.
- Remove from the oven and cool completely in the pan.
- Refrigerate for at least 1 hour before slicing into bars.
- Lift the bars from the pan using the parchment paper and cut into squares.
Notes
- Use blanched almond flour for a smoother, more tender crust.
- Pure maple syrup provides the best natural sweetness and flavor.
- Toast the pecans before using them for a deeper, nuttier taste.
- Allow the bars to cool completely before cutting so the filling can firm up.
- Store covered in the refrigerator for up to 5 days.
- Freeze individual bars in an airtight container for up to 2 months.
- For a dairy-free version, use coconut oil as listed and ensure all other ingredients are dairy-free.
DID YOU MAKE THIS EASY RECIPE?
If you have, then share it with us by sending a photo. We’re excited to see what you've made:-)Printable Recipe Card
Want just the essential recipe details without scrolling through the article? Get our printable recipe card with just the ingredients and instructions.


