
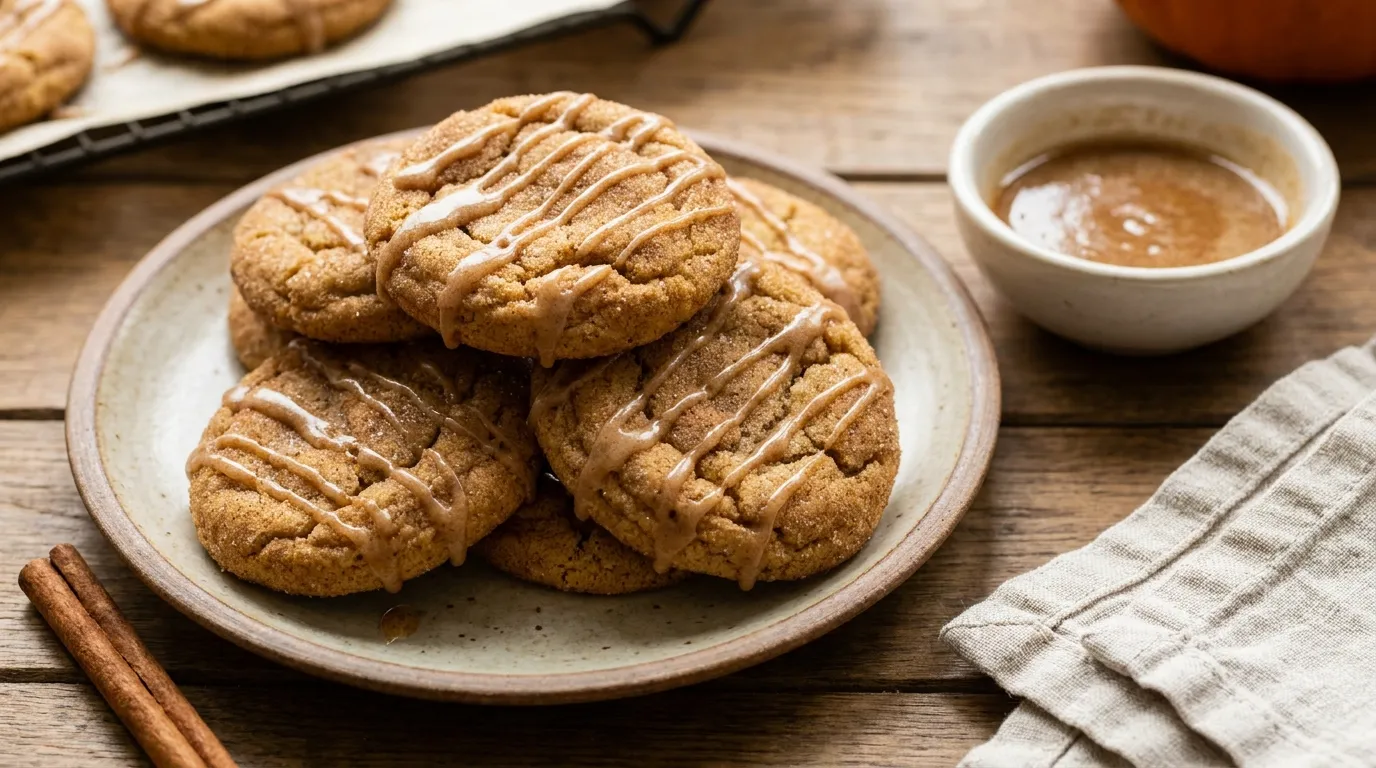
Brown Butter Pumpkin Snickerdoodle Cookies
I signed up for the fall bake sale at my kid’s school without really thinking it through. Three dozen cookies, due Friday morning, and I was scrolling through recipes at midnight on Wednesday like it was some kind of emergency.
I had a can of pumpkin puree from a Thanksgiving prep run gone too early, a stick of butter, and a vague memory of a snickerdoodle recipe my aunt used to make. So I combined them, browned the butter because I’d read somewhere that it “elevates everything,” and hoped for the best.
Those cookies sold out before the second-grade table even got a chance to set up their lemonade stand next to it. A few parents cornered me afterward asking where I bought them. I still kind of laugh about that, because I made them half-asleep at midnight with ingredients I basically had lying around. That chaotic little bake sale moment is the reason this recipe now lives permanently on a sticky note taped inside my spice cabinet.
Snickerdoodles themselves have been a fixture of American home baking for generations, with roots often traced back to German and Dutch immigrant baking traditions in New England. This pumpkin, brown butter spin is my own twist on that old-fashioned cookie, built for the season when pumpkin shows up in absolutely everything.
Why You’ll Love This Recipe
- Bakery-level flavor from an easy home recipe — the brown butter does a lot of heavy lifting here.
- Great for baking in bulk — this recipe scales up easily if you’re baking for a crowd, a bake sale, or a cookie exchange.
- Budget-friendly — everything on this list is stuff most people already have in their kitchen during pumpkin season.
- Soft centers, crisp cinnamon-sugar edges — the textural contrast is what makes people go back for a second one.
- Freezer-friendly dough means you can always have a stash ready to bake on short notice.
Ingredients List
For the Cookie Dough
- 1 cup unsalted butter (2 sticks)
- 2 ¾ cups all-purpose flour
- 1 tsp baking soda
- ½ tsp cream of tartar
- ½ tsp salt
- 1 ¼ tsp ground cinnamon
- ¼ tsp ground nutmeg
- ⅛ tsp ground cloves
- 1 cup granulated sugar
- ½ cup dark brown sugar, packed
- ½ cup pumpkin puree (plain, not pie filling)
- 1 large egg yolk
- 1 tsp vanilla extract
For the Cinnamon-Sugar Coating
- ⅓ cup granulated sugar
- 1 tbsp ground cinnamon
- ¼ tsp ground nutmeg
Substitution notes: Dark brown sugar gives a slightly deeper, more molasses-forward flavor than light brown sugar — if you only have light brown sugar on hand, it’ll still work fine, just slightly milder. If cream of tartar isn’t in your pantry, you can use 2 teaspoons of baking powder in place of the baking soda and cream of tartar combo, though you’ll lose a bit of that classic tangy snickerdoodle bite.

Step-by-Step Instructions
- Brown the butter (6–8 minutes). Melt the butter in a cast iron skillet or light-colored saucepan over medium heat. Once melted, keep whisking as it foams and bubbles. Watch closely — you’re looking for small golden-brown flecks at the bottom of the pan and a toasted, nutty smell. The second you see that, take it off the heat.
- Cool it down (15–20 minutes). Pour the browned butter, brown bits and all, into your mixing bowl and let it cool until just warm. Rushing this step will scramble your egg yolk when you add it later, so be patient here.
- Mix wet ingredients (3 minutes). Using a stand mixer fitted with the paddle attachment (or a hand mixer, or a sturdy whisk and some arm strength), beat the sugars into the cooled brown butter until combined. Add the pumpkin puree, egg yolk, and vanilla, and mix until smooth and lightly fluffy.
- Add dry ingredients (3–4 minutes). Whisk the flour, baking soda, cream of tartar, salt, cinnamon, nutmeg, and cloves together in a separate bowl. Add this to the wet mixture in two additions on low speed, mixing just until combined. The dough should be soft and slightly sticky, but it should hold its shape when you scoop it.
- Chill the dough (1 hour, or up to 2 days). Cover and refrigerate. This is non-negotiable if you want thick, chewy cookies instead of flat, greasy ones — the colder dough holds together in the oven instead of spreading out immediately.
- Preheat and prep (10 minutes): Preheat the oven to 350°F and line two baking sheets with parchment paper. Mix your cinnamon-sugar coating in a small shallow bowl.
- Portion and coat (10–15 minutes) Using a medium cookie scoop, portion the dough into balls about 1 ½ tablespoons each. Roll each ball briefly between your palms to smooth it out, then roll it through the cinnamon sugar until fully coated.
- Bake (10–12 minutes). Arrange the dough balls 2 inches apart on your prepared sheets. Bake until the edges look set, and the tops have started to crackle, but the centers still look a little soft — they’ll continue to set as they cool on the pan.
- Cool briefly on the pan (5 minutes). Let the cookies rest on the hot baking sheet for about 5 minutes before transferring them to a wire rack. They firm up quickly once out of the oven.
Pro Tips & Tricks
- Use a light-colored pan when browning butter. A dark skillet makes it nearly impossible to judge the color, and that’s usually how butter goes from browned to burnt without warning.
- Chill the dough for the full hour if you can. I tried skipping straight to 20 minutes once when I was rushing, and the cookies spread out thin instead of staying puffy.
- Slightly underbake for the best texture. Pull them the moment the centers look just barely set — they finish cooking on the pan, and overbaked snickerdoodles turn dry fast.
- Storage: Store in an airtight container at room temperature for up to 5 days. Adding a slice of plain white bread to the container helps keep them soft longer.
- Scale up for events. This recipe doubles or triples cleanly, which is exactly what saved me during that bake sale scramble — just make sure you have enough bowl space and baking sheets to keep the process moving.
Variations & Substitutions
For a maple-pecan version, fold ½ cup of chopped toasted pecans into the dough and swap the vanilla extract for maple extract. It leans the flavor toward a maple breakfast pastry, which is one of my favorite fall combinations.
If you need a gluten-free version, a 1:1 gluten-free flour blend with xanthan gum works well here. The dough may feel slightly more delicate, so handle it gently when rolling and avoid overmixing.
For a spicier, chai-inspired twist, add ¼ teaspoon ground cardamom and a small pinch of black pepper to the dough. It sounds unusual, but it gives the cookies a warm, layered spice profile that surprises people in a good way.
Serving Suggestions
These are perfect packed into a lunchbox, brought to a school event, or set out on a dessert table next to apple cider and caramel corn. They pair especially well with a warm chai latte or a simple cup of black coffee.
If you’re hosting a fall gathering, stack a few on a plate with some cinnamon sticks for a simple, cozy presentation — no fancy styling required.
FAQs
Do I have to brown the butter, or can I just melt it?
You can use regular melted butter if you’re short on time, and the cookies will still turn out well. Browning it adds a deeper, toasted flavor that’s worth the extra 10 minutes if you have it.
Why did my cookies turn out flat?
Flat cookies almost always come down to warm dough or skipping the chill time. Make sure the brown butter is fully cooled before mixing, and don’t skip the fridge rest before baking.
Can I prep this dough ahead of a bake sale or party?
Yes, and I’d actually recommend it. The dough holds well in the fridge for up to 2 days, which makes morning-of baking much less stressful.
What’s the best way to store leftovers?
Keep them in an airtight container at room temperature for up to 5 days. They also do well reheated for about 8–10 seconds in the microwave if you want that fresh-baked warmth back.
Can I freeze this dough or the baked cookies?
Both freeze well. Roll and coat the dough balls, freeze them on a tray, then transfer to a freezer bag and bake straight from frozen with an extra 1–2 minutes of bake time. Baked cookies also freeze well in an airtight container for up to 2 months.
My cookies came out dry instead of chewy. What did I do wrong?
This is often caused by measuring too much flour or overbaking. Spoon your flour into the measuring cup instead of scooping directly from the bag, and pull the cookies from the oven while the centers still look a touch underdone.
Read More Recipes:
- Easy Pumpkin Spice Cinnamon Rolls
- Cinnamon Roll Pumpkin Bread with Cream Cheese Glaze
- Pumpkin Coffee Cake with Brown Sugar Streusel
- Double Chocolate Pumpkin Bread
- Mini Pumpkin Bread with Cinnamon Swirl
Final Thoughts
I still think about that midnight bake sale scramble every time I brown butter for these cookies. Funny how the recipes that come together out of pure necessity end up being the ones people remember most.
If you make these for your own bake sale, potluck, or just a quiet weekend at home, I’d love to hear how they turn out. Drop a comment and let me know if you tried the maple-pecan version or kept it classic — either way, I hope they disappear just as fast as mine did.
Printable Recipe Card
Want just the essential recipe details without scrolling through the article? Get our printable recipe card with just the ingredients and instructions.


