
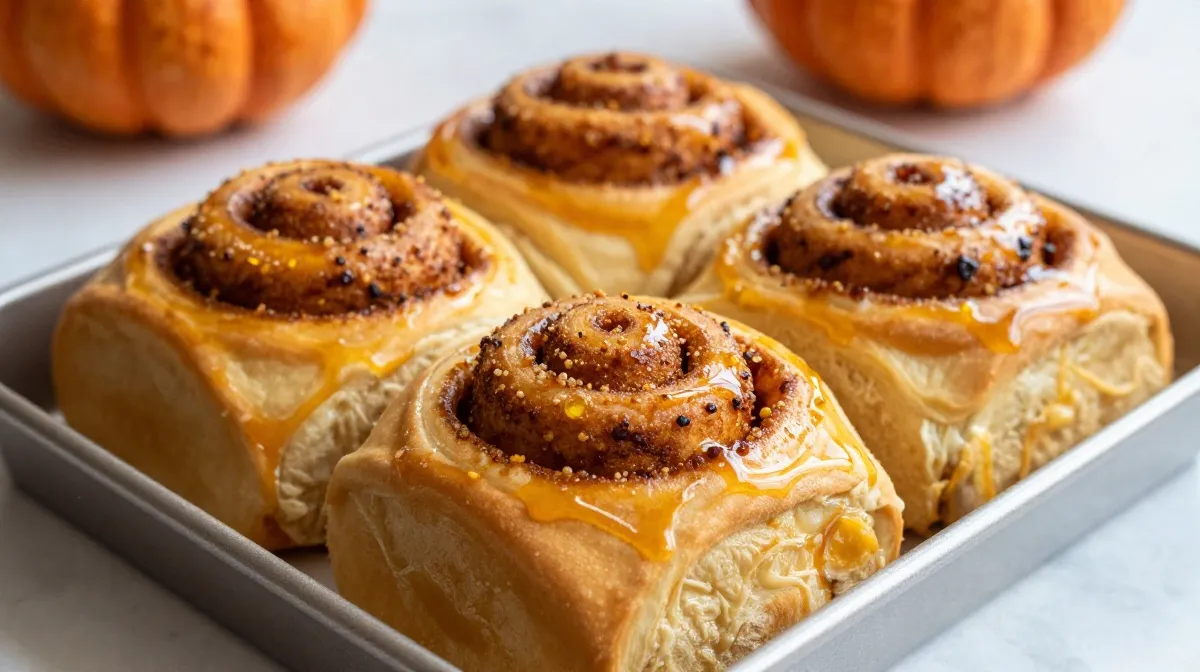
Easy Pumpkin Spice Cinnamon Rolls
The first time I made pumpkin spice cinnamon rolls, I wasn’t even trying to be seasonal. It was late October, I had half a can of pumpkin puree left over from a batch of muffins, and I couldn’t bring myself to throw it out. So I did what any slightly chaotic home baker does at 9 pm on a Tuesday — I googled “what do I do with leftover pumpkin” and fell down a rabbit hole that ended with cinnamon roll dough in my stand mixer.
I didn’t expect much. I figured the pumpkin would just make the dough a little orange and call it a day. Instead, I pulled these soft, pillowy rolls out of the oven the next morning, and my whole apartment smelled like a candle store during the first week of September. My roommate at the time walked into the kitchen, stopped dead, and said: “Okay, we’re doing this every weekend now.”
We didn’t do it every weekend. But we did it enough that this recipe is now permanently taped inside my cabinet, stained with cream cheese frosting and covered in my own scribbled notes. That’s the version I’m sharing with you today.
Why You’ll Love This Recipe
- The dough is genuinely soft — the pumpkin puree adds moisture that keeps these rolls tender for days, not just the first hour out of the oven.
- It’s a make-ahead dream — you can prep the whole tray the night before and just bake in the morning, which is a lifesaver for holiday mornings.
- Warm spice flavor without being overpowering — this isn’t a pumpkin pie pretending to be a cinnamon roll; it’s a cinnamon roll with a cozy autumn twist.
- No fancy equipment required — a stand mixer helps, but you can absolutely knead this by hand if that’s more your speed.
- The cream cheese frosting alone is worth making this recipe for. I’m not exaggerating.
Ingredients List
For the Dough
- 3 ½ cups all-purpose flour (plus a bit more for kneading)
- 1 packet (2 ¼ tsp) active dry yeast
- ¾ cup whole milk, warmed to about 110°F
- ½ cup pumpkin puree (not pumpkin pie filling — check the can)
- ⅓ cup granulated sugar
- ¼ cup unsalted butter, melted and slightly cooled
- 1 large egg
- 1 tsp salt
- 1 ½ tsp pumpkin pie spice (or make your own — recipe note below)
For the Filling
- ½ cup unsalted butter, softened to room temperature (not melted)
- ⅔ cup brown sugar, packed
- 2 tbsp pumpkin pie spice
- 1 tbsp ground cinnamon
- Pinch of salt
For the Cream Cheese Frosting
- 4 oz cream cheese, softened
- ¼ cup unsalted butter, softened
- 1 ½ cups powdered sugar
- ½ tsp vanilla extract
- Pinch of salt
- 1–2 tbsp milk, to thin if needed
Substitution notes: No pumpkin pie spice on hand? Mix 1 tsp cinnamon, ¼ tsp ginger, ¼ tsp nutmeg, and a pinch of cloves — that combo works everywhere I’ve listed pumpkin pie spice above. You can also swap the whole milk for oat milk if that’s what’s in your fridge; I’ve done it and honestly couldn’t tell the difference.

Step-by-Step Instructions
- Bloom your yeast (5–10 minutes). Warm your milk until it feels like a warm bath — not hot, or you’ll kill the yeast. Stir in the yeast and a pinch of the sugar, then let it sit until it gets foamy on top. If it doesn’t foam, your yeast is dead, and you need a new packet. Don’t skip this check.
- Mix the wet ingredients (2 minutes). In your stand mixer bowl (or a big mixing bowl if going by hand), whisk together the pumpkin puree, melted butter, egg, and sugar until smooth. Pour in your foamy yeast mixture and stir to combine.
- Add the dry ingredients (5–8 minutes). Add the flour, salt, and pumpkin pie spice. Using the dough hook, mix on low until a shaggy dough forms, then increase speed slightly and knead for about 6–8 minutes. The dough should pull away from the sides of the bowl and feel smooth and slightly tacky — if you poke it, it should spring back like an earlobe. If it’s sticking to your fingers like glue, add flour a tablespoon at a time.
- First rise (1 to 1 ½ hours): Shape the dough into a ball, place it in a lightly greased bowl, cover with a damp towel or plastic wrap, and set it somewhere warm. It’s ready when it’s doubled in size — press two fingers in, and if the indent stays, it’s proofed.
- Roll out the dough (5 minutes). Punch the dough down gently (this part is oddly satisfying) and roll it out on a floured surface into a rectangle roughly 16×12 inches. Don’t stress about perfect edges — mine never are.
- Add the filling (5 minutes). Spread the softened butter evenly across the dough all the way to the edges. In a small bowl, mix the brown sugar, cinnamon, and pumpkin pie spice, then sprinkle it evenly over the buttered dough. Press it down gently with your palms so it sticks.
- Roll and slice (10 minutes) Starting from the longer side, roll the dough tightly into a log. Use a piece of unflavored dental floss or a sharp serrated knife to slice it into 12 even rolls — floss sounds odd, but it gives you cleaner cuts than a knife ever will.
- Second rise (30–45 minutes): Arrange the rolls in a greased 9×13 baking dish, cover, and let them rise again until puffy and touching each other.
- Bake (22–25 minutes) Bake at 350°F until golden brown on top and the centers are cooked through — a toothpick in the middle roll should come out clean, not doughy.
- Frost while warm (5 minutes): Beat the cream cheese and butter together until smooth, then add powdered sugar, vanilla, and salt. Add milk if it’s too thick to spread. Spread it generously over the rolls while they’re still warm so it melts slightly into every crevice.
Pro Tips & Tricks
- Don’t rush the yeast proofing step. I once used lukewarm-but-not-quite-right milk and ended up with dense, sad rolls. It’s worth the extra five minutes to get it right.
- Room temperature butter for the filling matters. Melted butter runs off the dough and pools at the bottom of the pan instead of staying put — softened butter spreads and clings.
- Make it the night before. Assemble the rolls in the pan, cover tightly, and refrigerate overnight instead of doing the second rise on the counter. Pull them out in the morning, let them sit at room temp for 20–30 minutes while your oven preheats, then bake.
- Storage: Keep leftovers covered at room temperature for up to 2 days, or in the fridge for up to a week. They dry out a little in the fridge, so warm them in the microwave for 15–20 seconds before eating.
- Freeze unbaked rolls. After slicing, freeze them on a tray before the second rise, then transfer to a freezer bag. When you want them, thaw overnight in the fridge and let them do their second rise the next morning.
Variations & Substitutions
If you want a vegan version, swap the butter for a plant-based stick butter, use a plant milk, and replace the egg with 3 tablespoons of aquafaba or a flax egg. The frosting works well with dairy-free cream cheese too — I’ve tested it, and the texture holds up nicely.
For a gluten-free version, use a 1:1 gluten-free flour blend that includes xanthan gum. The dough will feel a little different — less stretchy, more crumbly — but it still bakes up soft. Just don’t overwork it while kneading.
If you like things spicier and bolder, double the cinnamon in the filling and add a pinch of cayenne to the pumpkin spice mix. It sounds strange, but that tiny kick against the sweetness is something I stumbled into by accident and now can’t go back from.
Serving Suggestions
These are best served warm, straight out of the pan, with a hot cup of coffee or spiced chai. They’re the kind of thing that feels right for a slow Sunday morning, a Thanksgiving brunch table, or honestly just a random Tuesday when you want your house to smell incredible.
I like setting them out alongside some scrambled eggs or bacon to balance out the sweetness — it turns “dessert for breakfast” into something that at least resembles a real meal.
FAQs
Can I use fresh pumpkin instead of canned?
Yes, but make sure it’s well-drained. Fresh roasted pumpkin puree holds more water than canned, and extra moisture can make your dough sticky and hard to work with. Pat it dry with a paper towel before measuring.
Why didn’t my rolls rise?
The most common culprit is yeast that’s expired or was mixed with milk that was too hot. Double-check your yeast is still active before starting, and aim for milk around 110°F — warm, not steaming.
Can I make the dough ahead of time?
Absolutely. You can refrigerate the dough after the first rise for up to 24 hours, then bring it to room temperature before rolling and filling. This also deepens the flavor a bit.
How do I store leftovers and reheat them?
Store them covered at room temperature for 2 days or in the fridge for up to a week. Reheat in the microwave for 15–20 seconds, or in a 300°F oven for about 5–10 minutes if you want the edges slightly crisp again.
Can I freeze baked rolls?
Yes, though I prefer freezing them unbaked for the best texture. If freezing baked rolls, wrap them tightly and freeze without frosting, then thaw and frost after reheating.
My filling leaked out everywhere while baking — what went wrong?
This usually happens when the dough is rolled too loosely, or the filling butter was melted instead of softened. Roll tightly and press the filling in firmly before rolling up the log.
- Read More Recipes:
Cinnamon Roll Pumpkin Bread with Cream Cheese Glaze - Pumpkin Coffee Cake with Brown Sugar Streusel
- Double Chocolate Pumpkin Bread
- Mini Pumpkin Bread with Cinnamon Swirl
- Warm Apple Cinnamon Roll Casserole
- Easy Apple Bread Pudding with Caramel Sauce
Final Thoughts
There’s something about pulling a tray of these out of the oven that makes a kitchen feel like home, even if it’s a tiny apartment kitchen with a wobbly oven rack like mine was back then. I’ve made this recipe more times than I can count now, and it still gets the same reaction every single time — someone wandering in asking what smells so good.
If you make these, I’d genuinely love to hear how they turn out for you. Tag me, leave a comment, tell me if you added extra cinnamon or went rogue with the frosting. That’s half the fun of sharing a recipe like this one.
Printable Recipe Card
Want just the essential recipe details without scrolling through the article? Get our printable recipe card with just the ingredients and instructions.


