
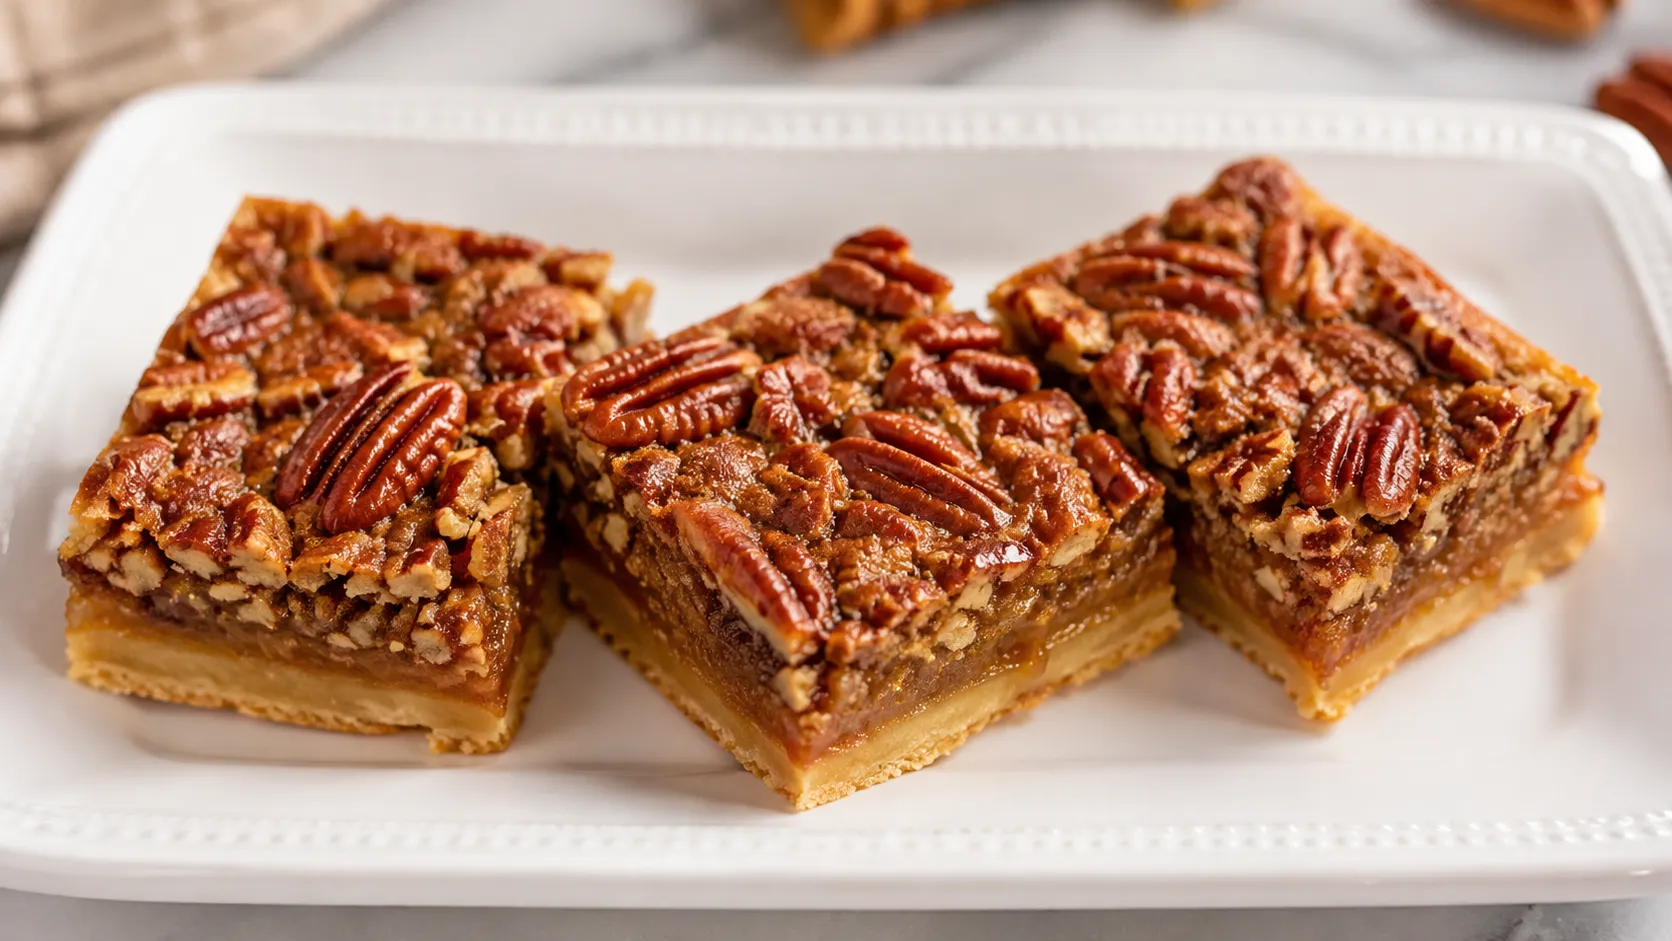
Delicious Chewy Pecan Pie Bars Recipe
I used to be terrified of making pecan pie. Every Thanksgiving, I’d watch my aunt fuss over her pie crust like it owed her money — chilling the dough, worrying about soggy bottoms, timing the filling so it set just right but didn’t scorch. I loved eating it. I dreaded making it.
Then one November, short on time and completely out of pie plates (don’t ask), I dumped a shortbread crust into a 9×13 pan, poured a pecan filling over it, and baked the whole thing as bars instead. I almost didn’t tell anyone what I’d done, half-expecting a disaster.
They were gone in twenty minutes. My uncle, a pecan pie purist if there ever was one, asked for the recipe before he’d even finished his second bar. That was the day chewy pecan pie bars became my go-to instead of the pie, and I haven’t looked back since.
Why You’ll Love This Recipe
- No pie crust skills required — the shortbread base comes together in one bowl with a fork or your hands.
- Way easier to serve a crowd — no fighting over clean pie slices, just cut and go.
- Budget-friendly — pantry staples you likely already have, except for pecans.
- Portable — these travel to potlucks and holiday dinners far better than a pie ever could.
- That chewy, gooey center everyone loves about pecan pie, just easier to nail every time.
Ingredients You’ll Need
For the Shortbread Crust
- 2 cups all-purpose flour
- ½ cup granulated sugar
- ¼ teaspoon salt
- ¾ cup unsalted butter, cold and cubed
Substitution tip: You can swap in a gluten-free 1:1 flour blend here with good results — just make sure it contains xanthan gum for structure.
For the Pecan Filling
- ¾ cup packed brown sugar
- ⅔ cup light corn syrup (or maple syrup as a substitute)
- ¼ cup unsalted butter, melted
- 3 large eggs
- 1 tablespoon vanilla extract
- ¼ teaspoon salt
- 2 ½ cups pecan halves or pieces, lightly toasted
A note on pecans: whole halves look beautiful on top, but chopped pecans mean every single bar gets a good bite of nut in each corner. I usually do a mix of both.

Step-by-Step Instructions
Step 1: Prep Your Pan (2 minutes)
Preheat your oven to 350°F (175°C). Line a 9×13-inch baking pan with parchment paper, leaving some overhang on the sides — this makes lifting the bars out later so much easier. Trust me, don’t skip this part.
Step 2: Make the Shortbread Dough (5 minutes)
In a large bowl, whisk together the flour, sugar, and salt. Add the cold, cubed butter and work it in with your fingers or a pastry cutter until the mixture looks like coarse crumbs — kind of like wet sand with pea-sized lumps of butter still visible. It should hold together when you press a bit between your fingers.
Step 3: Press and Pre-Bake the Crust (18–20 minutes)
Dump the dough into your lined pan and press it firmly and evenly into the bottom, using the bottom of a measuring cup to smooth it out. Bake for 18–20 minutes, until the edges turn light golden brown. It won’t look fully done, and that’s fine — it’ll bake again with the filling.
Step 4: Toast the Pecans (5 minutes)
While the crust bakes, toast your pecans in a dry skillet over medium heat, stirring often, until they smell nutty and fragrant — about 4–5 minutes. Keep a close eye on them; they go from toasted to burnt fast. Set aside to cool.
Step 5: Make the Filling (5 minutes)
In a medium bowl, whisk together the brown sugar, corn syrup, melted butter, eggs, vanilla, and salt until smooth. Stir in the toasted pecans. The mixture should look glossy and pourable, almost like a thin caramel sauce with nuts floating in it.
Step 6: Bake the Bars (28–32 minutes)
Pour the pecan filling evenly over the pre-baked crust, spreading the pecans out so they’re not all clumped in one spot. Bake for 28–32 minutes, until the filling is set around the edges but still has a slight jiggle in the very center — similar to how a cheesecake looks when it’s almost done.
Step 7: Cool Completely (At least 2 hours)
This is the hardest step, hands down. Let the bars cool completely in the pan at room temperature, then pop them in the fridge for at least an hour before slicing. Cutting them warm gives you a gooey mess instead of clean bars — I learned that one the hard way, more than once.
Step 8: Slice and Serve
Lift the bars out using the parchment overhang, place on a cutting board, and slice into squares or rectangles with a sharp knife. Wipe the blade clean between cuts for the neatest edges.
Pro Tips & Tricks
- Cold butter is non-negotiable for the crust. Warm butter makes a greasy, flat base instead of that short, crumbly texture you want.
- Don’t skip toasting the pecans. I skipped this once when I was in a rush, and the difference in flavor was noticeable — raw pecans just taste dull by comparison.
- Chill before slicing, always. I know it’s tempting to dig in right away, but a fully chilled pan gives you those clean, bakery-style bars instead of a sticky puddle.
- Make them a day ahead. These bars taste even better the next day once the filling fully sets and the flavors settle in.
- Store them right. Keep bars in an airtight container in the fridge for up to a week — they hold their chewy texture beautifully.
Variations & Substitutions
If you want a bourbon version, add a tablespoon of bourbon to the filling along with the vanilla. It adds this deep, warm undertone that pairs so well with the brown sugar and toasted pecans — my personal favorite for holiday parties.
For a chocolate twist, sprinkle ½ cup of chocolate chips over the crust before pouring on the pecan filling. The melted pockets of chocolate against the caramel-y pecan layer taste like a turtle candy in bar form.
Want it dairy-free? Swap the butter in both the crust and filling for a plant-based butter alternative — just make sure it’s a stick-style one meant for baking, not a spreadable tub version, or your crust won’t hold together as well.
Serving Suggestions
These bars are rich and sweet, so a small square goes a long way. I like serving them slightly chilled with a scoop of vanilla ice cream on the side, or alongside a strong cup of coffee to balance out the sweetness.
They’re perfect for Thanksgiving dessert tables, cookie exchanges, or just tucked into a container for a holiday potluck — nobody will guess how easy they were to make.
FAQs
Can I make these pecan pie bars ahead of time?
Yes, and honestly, I recommend it. Make them up to 2 days in advance and store covered in the fridge. The flavor and texture actually improve after a day of chilling.
Can I freeze pecan pie bars?
Absolutely. Once fully cooled and sliced, freeze the bars in a single layer, then transfer to an airtight container with parchment between layers. They keep well for up to 2 months — just thaw in the fridge overnight before serving.
Why are my bars runny in the middle?
This usually means they need a bit more bake time or more chill time. The filling firms up significantly as it cools, so if it’s jiggly straight out of the oven, that’s normal — but if it’s still soupy after a few hours in the fridge, it likely needed an extra 3–5 minutes in the oven.
Can I use walnuts instead of pecans?
You can, though the flavor won’t be quite the same. Walnuts have a slightly more bitter, earthy taste compared to the buttery sweetness of pecans, but they’ll work fine texture-wise if that’s what you have on hand.
What if I don’t have corn syrup?
Maple syrup or golden syrup both work well as substitutes, though maple syrup will give the filling a slightly different, more autumnal flavor. Just avoid using pancake syrup — it’s too thin and overly sweet.
My crust turned out too crumbly to slice. What went wrong?
This usually happens if the crust wasn’t pressed firmly enough before baking, or if it was pre-baked for too long. Press it down firmly and evenly next time, and pull it from the oven right when the edges turn golden, not beyond.
Read More Recipes:
- Easy Pecan Pie Cheesecake Recipe
- Butter Pecan Praline Poke Cake
- Homemade Cranberry Bliss Bars Recipe
- Maple Walnut Blondies
- Pumpkin Milk Tarts with Cinnamon
- Homemade Caramel Apple Dump Cake
Final Thoughts
These chewy pecan pie bars replaced a holiday tradition in my family without anyone putting up a fight, which seldom happens when you mess with tradition. They’ve got everything I love about pecan pie, minus the stress of a fussy crust.
If you give these a try, I’d love to hear how they turn out, or what twist you end up adding to make them your own. Leave a comment and let me know — and maybe try the bourbon version first. Just a suggestion.


Delicious Chewy Pecan Pie Bars Recipe
Ingredients
Method
- Preheat the oven to 350°F (175°C) and line a 9×9-inch baking pan with parchment paper.
- Beat the softened butter, sugar, vanilla, and salt until smooth and creamy.
- Gradually mix in the flour until a soft dough forms.
- Press the dough evenly into the bottom of the prepared pan.
- Bake the crust for 15–18 minutes, until lightly golden around the edges.
- Meanwhile, whisk together brown sugar, maple syrup, corn syrup, melted butter, eggs, vanilla, cinnamon, and salt.
- Stir the pecans into the filling mixture.
- Pour the pecan filling evenly over the warm crust.
- Return the pan to the oven and bake for 25–30 minutes, until the filling is set around the edges and slightly soft in the center.
- Remove from the oven and allow the bars to cool completely in the pan.
- Refrigerate for 1–2 hours for easier slicing.
- Lift the bars from the pan using the parchment paper and cut into squares.
Notes
- Use fresh pecans for the best flavor and crunch.
- Toast the pecans before adding them for an even richer flavor.
- Do not overbake the filling; the center should remain slightly soft for chewy bars.
- Cool completely before slicing to help the filling set properly.
- For cleaner cuts, chill the bars before serving.
- Store in an airtight container at room temperature for up to 3 days or refrigerate for up to 1 week.
- Freeze tightly wrapped bars for up to 2 months.
DID YOU MAKE THIS EASY RECIPE?
If you have, then share it with us by sending a photo. We’re excited to see what you've made:-)Printable Recipe Card
Want just the essential recipe details without scrolling through the article? Get our printable recipe card with just the ingredients and instructions.


