
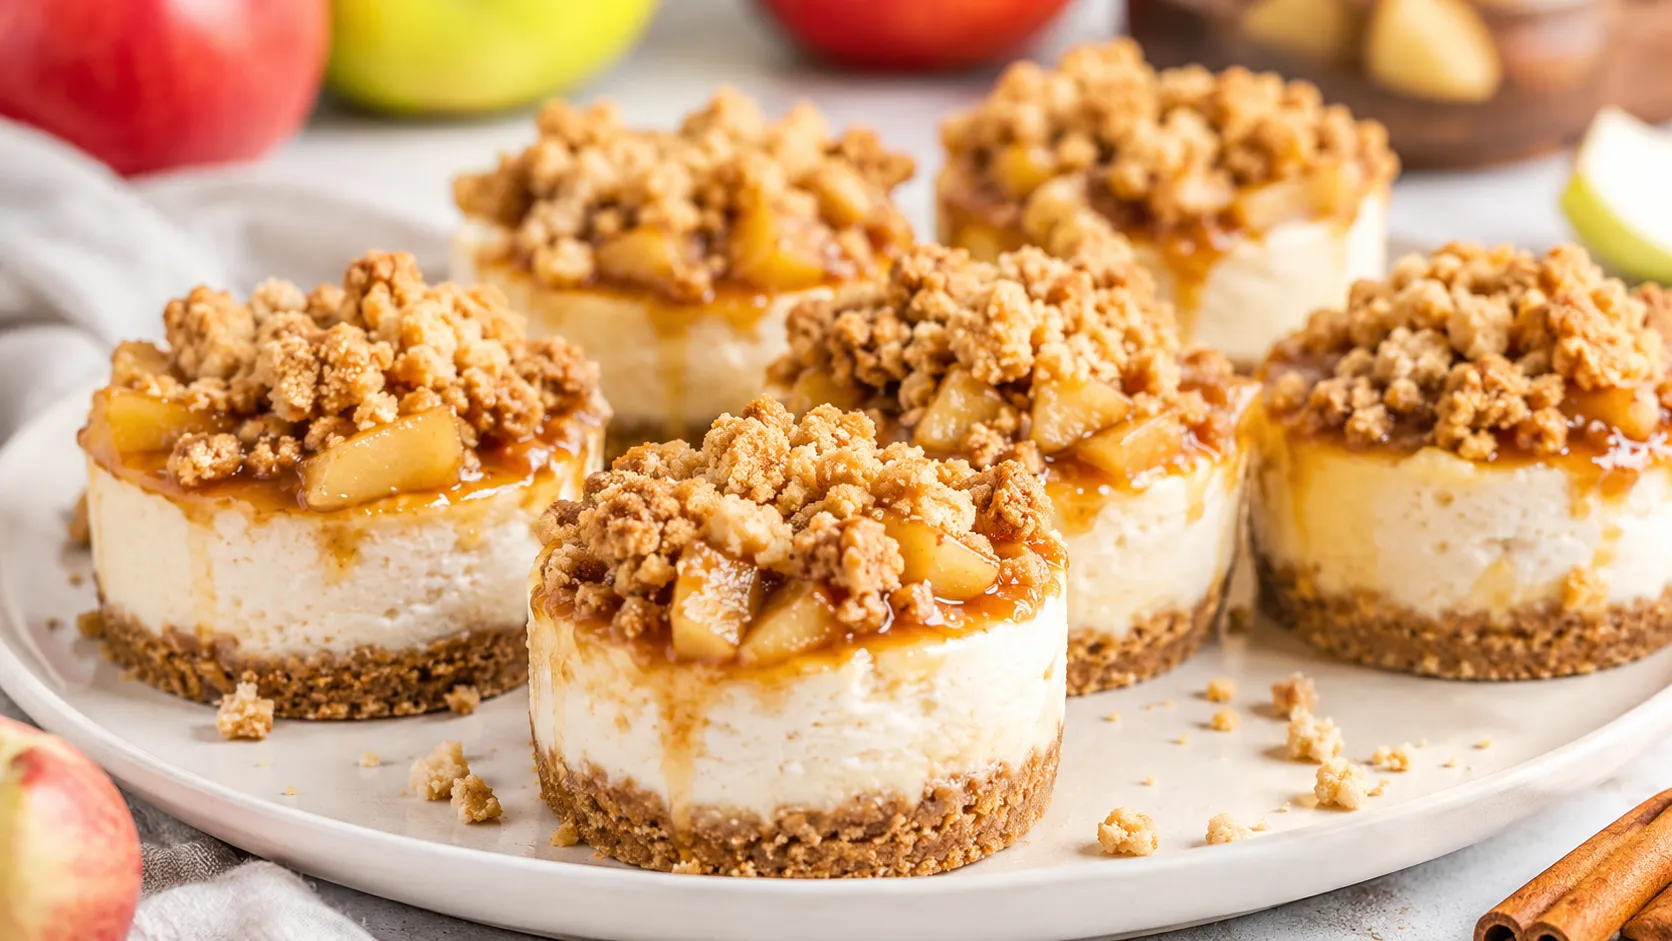
Easy Apple Crisp Mini Cheesecakes
I made these for the first time because I genuinely could not decide between baking apple crisp or cheesecake for a family get-together, and rather than pick one, I just decided to shrink both of them into muffin tins and call it a day. My cousin took one bite, stopped mid-sentence, and just said: “Wait, what is this?” That reaction is basically why I keep making them.
Apple crisp mini cheesecakes are exactly what they sound like — individual cheesecakes with a graham cracker base, a creamy tangy filling, and a crumbly cinnamon-oat topping baked right on top like a tiny apple crisp decided to move in. They’re portable, they’re portioned, and nobody has to fight over who gets the corner piece.
If you love the cozy, spiced comfort of apple crisp but also can’t say no to cheesecake, this is the dessert where you stop choosing and just have both.
Why You’ll Love This Recipe
- Perfectly portioned — no slicing, no serving spoon drama, just grab one and go.
- Great for parties — they look impressive sitting on a platter but take way less effort than a full cheesecake.
- Freezer-friendly — make a big batch and pull out exactly what you need, when you need it.
- Beginner-proof cheesecake — no springform pan, no water bath, no cracking anxiety.
- That apple crisp topping is dangerously good — I’ve caught myself eating the crumb topping straight off the spoon more than once.

Ingredients You’ll Need
Makes 12 mini cheesecakes
For the Crust
- 1 1/4 cups graham cracker crumbs (about 9-10 full sheets, crushed)
- 4 tablespoons unsalted butter, melted
- 2 tablespoons granulated sugar
For the Cheesecake Filling
- 16 oz (two 8 oz blocks) cream cheese, softened to room temperature
- 1/2 cup granulated sugar
- 2 large eggs
- 1 teaspoon vanilla extract
- 1/4 cup sour cream (this keeps the filling extra creamy — Greek yogurt works too if that’s what you have)
For the Cinnamon Apples
- 1 1/2 cups apples, peeled and diced small (about 2 medium apples — Granny Smith or Honeycrisp both work great)
- 2 tablespoons brown sugar
- 1/2 teaspoon ground cinnamon
- 1 teaspoon lemon juice
- 1 tablespoon unsalted butter
For the Crisp Topping
- 1/3 cup old-fashioned rolled oats
- 1/3 cup all-purpose flour
- 3 tablespoons brown sugar
- 1/2 teaspoon ground cinnamon
- 3 tablespoons unsalted butter, cold and cubed
- Pinch of salt
Substitution note: If you’re not an oat person, you can leave them out and just use flour, sugar, cinnamon, and butter for a more traditional streusel topping. And if you’re short on time, a good store-bought caramel sauce drizzled on top after baking is a great shortcut for the crisp topping’s flavor, even if it skips the crunch.
Step-by-Step Instructions
- Preheat and prep (5 minutes) Preheat your oven to 325°F (165°C). Line a standard 12-cup muffin tin with paper liners. This isn’t the time to skip liners — trust me, peeling a naked mini cheesecake out of a muffin tin is a heartbreaking experience I don’t want for you.
- Make the crust (8 minutes): Mix the graham cracker crumbs, melted butter, and sugar together until it resembles wet sand. Divide evenly among the 12 muffin liners, about 1 tablespoon each, and press down firmly with the back of a spoon or a small measuring cup. Bake for 5 minutes, then set aside to cool slightly.
- Cook the apples (6-8 minutes). In a small skillet over medium heat, melt the butter, then add the diced apples, brown sugar, cinnamon, and lemon juice. Cook, stirring often, until the apples soften but still hold their shape, about 6-8 minutes. Remove from heat and let cool while you make the filling — hot apples will melt your cheesecake batter if you add them too soon.
- Make the crisp topping (5 minutes). In a small bowl, combine the oats, flour, brown sugar, cinnamon, and salt. Add the cold, cubed butter and use your fingers to work it into the dry ingredients until it forms small, pea-sized crumbs. Pop this in the fridge while you finish the filling — cold topping crisps up better in the oven.
- Make the cheesecake filling (5 minutes). Beat the softened cream cheese with a hand mixer or stand mixer until completely smooth, about 2 minutes. Add the sugar and beat until combined. Mix in the sour cream and vanilla. Add the eggs one at a time, mixing on low just until each one is incorporated. Overbeating here is the number one reason mini cheesecakes crack, so keep your mixer on low once the eggs go in.
- Assemble (8 minutes): Spoon the cheesecake filling over each crust, filling each liner about 3/4 full. Top each one with a spoonful of the cooked apples, then sprinkle the crisp topping generously over everything.
- Bake (18-20 minutes). Bake until the crisp topping is golden brown and the cheesecake centers have just a slight jiggle — think a bowl of Jell-O when you nudge the pan, not liquid. This takes about 18-20 minutes for me, but start checking at 16 since ovens vary.
- Cool, then chill (this is the hardest part). Let the cheesecakes cool in the pan for 30 minutes at room temperature, then transfer to the fridge for at least 2 hours before serving. I know the smell coming from your kitchen will try to convince you otherwise, but the chill time is what gives you that dense, creamy cheesecake texture instead of a soft, custardy one.
Pro Tips & Tricks
- Room temperature cream cheese, no exceptions. Cold cream cheese leaves lumps no matter how long you beat it. Set it out an hour before you start.
- Cool your apples before adding them. Hot apples will turn your cheesecake batter soupy and uneven. A few minutes off the heat makes a big difference.
- Don’t overfill the liners. These cheesecakes puff slightly while baking, so leaving a little room at the top keeps everything contained and prevents overflow.
- Storage: Keep them in an airtight container in the fridge for up to 5 days. I like keeping them in their paper liners so they don’t dry out.
- Make-ahead tip: These are a great make-ahead dessert for parties — bake them a day or two in advance, and they’ll actually taste even better once the flavors settle overnight.
Variations & Substitutions
For a gluten-free version, swap the graham crackers for a gluten-free graham cracker alternative and use a 1:1 gluten-free flour blend in the crisp topping. The oats should already be gluten-free certified if that’s a concern for you — just double-check the label.
If you want a caramel apple version, drizzle a little caramel sauce over the apples before adding the crisp topping, and add another drizzle on top after baking. It adds a gooey sweetness that pairs beautifully with the tart apples.
Want a little more warmth? Add a pinch of ground ginger and a few gratings of fresh nutmeg to the apple mixture along with the cinnamon — it gives these a deeper, more spiced flavor that feels extra cozy in the colder months.
Serving Suggestions
These are perfect served slightly chilled, straight out of the fridge, though I won’t judge you for sneaking one while it’s still a little warm from the oven. A small drizzle of caramel sauce or a dollop of whipped cream on top takes them from great to genuinely irresistible.
They’re a natural fit for fall gatherings, Thanksgiving dessert tables, or a cookie-exchange-style party where individual treats make more sense than slicing a whole cake. I’ve also packed a few in a lunch bag for a coworker’s birthday, and they traveled perfectly.
FAQs
Can I freeze apple crisp mini cheesecakes?
Yes. Once fully chilled, freeze them in a single layer on a baking sheet until solid, then transfer to an airtight container or freezer bag for up to 2 months. Thaw overnight in the fridge before serving.
Why did my cheesecakes crack on top?
Cracking usually comes from overbeating the batter after the eggs go in, or from overbaking. Mix gently once the eggs are added, and pull them from the oven while the centers still have a slight jiggle.
Can I make these ahead of time for a party?
Definitely — these are one of those desserts that taste even better a day or two after baking, once everything has had time to chill and settle. Just add any caramel drizzle right before serving.
What apples work best for this recipe?
A firm, slightly tart apple like Granny Smith holds its shape well when cooked and balances the sweetness of the cheesecake and crisp topping. Honeycrisp is a great sweeter alternative if you prefer that.
Can I use a muffin tin without liners?
I’d really recommend using liners here — mini cheesecakes tend to stick to bare muffin tins, and liners make it so much easier to lift them out cleanly without losing half the crust.
How do I know when they’re done baking?
Look for a golden, slightly crisp topping and a center that jiggles slightly when you gently shake the pan, similar to Jell-O. They’ll continue to set as they cool, so slightly underbaked is safer than overbaked here.
Read More Recipes:
- Old-Fashioned Apple Cobbler with Buttery Topping
- Easy Caramel Apple Cheesecake Bars
- Moist Apple Fritter Bread with Cinnamon Glaze
- Easy Chinese Garlic Noodles in 15 Minutes
- Healthy Cashew Chicken Stir-Fry Recipe
Final Thoughts
These little cheesecakes have become one of my go-to fall desserts because they somehow feel both fancy and completely unfussy at the same time. Nobody needs to know how easy they actually are.
If you give these a try, I’d love to hear how they turn out in your kitchen, and if you find your own little trick along the way, share it — that’s exactly how I stumbled onto half the tips in this post to begin with.
Printable Recipe Card
Want just the essential recipe details without scrolling through the article? Get our printable recipe card with just the ingredients and instructions.


