
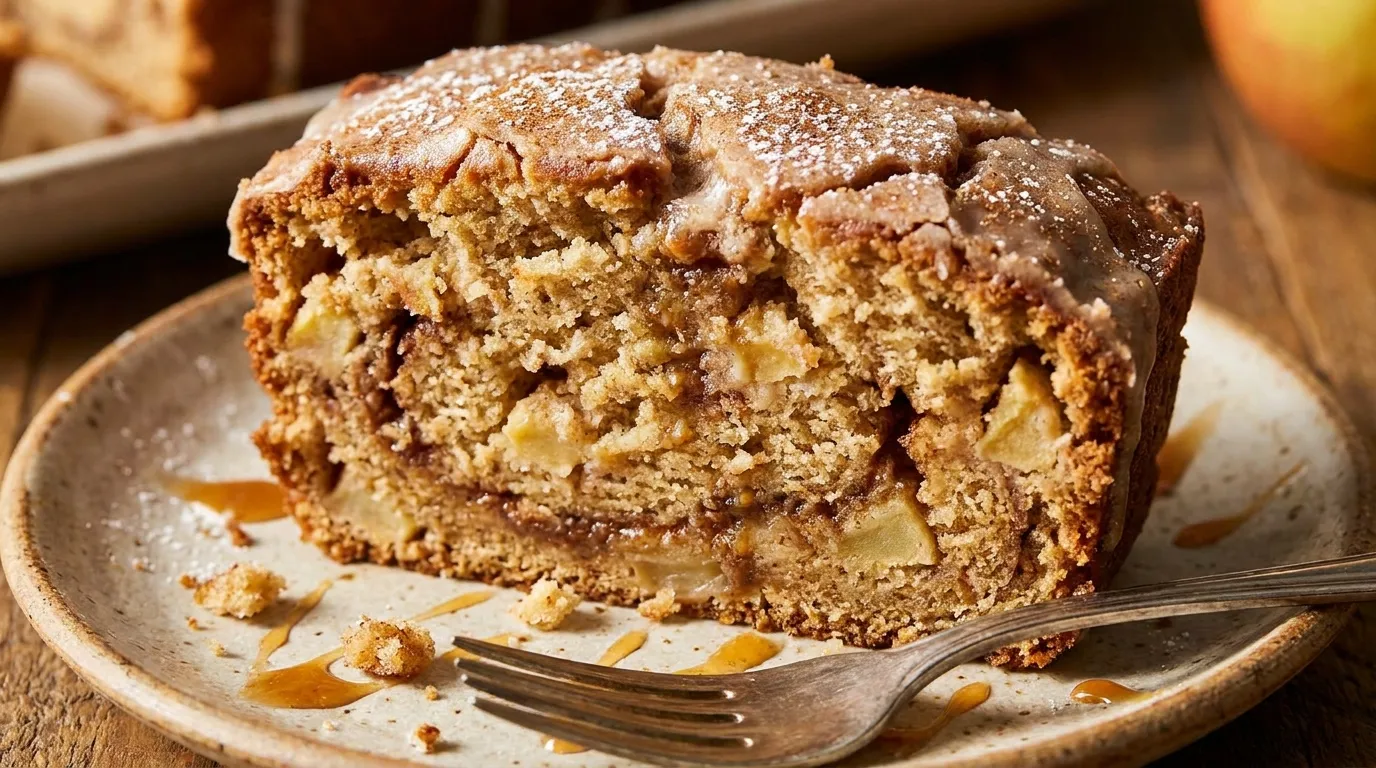
Gluten-Free Apple Cider Loaf
The first time I made this loaf, my kitchen smelled like a candle store had exploded, and I cried a little into my mixing bowl.
Not because anything went wrong. Because it was the first thing my gluten-free sister-in-law had eaten in months that actually tasted like a “treat” instead of a compromise. She took one bite, looked at me, and said, “Wait, this doesn’t taste sad.”
That’s the bar now. Not sad. That’s what I want for every gluten-free baked good in my house.
I’d been simmering apple cider down on the stove for a spiced cider drink, got distracted by a phone call, and came back to find it reduced to almost syrup. Instead of tossing it, I dumped it into a loaf batter I was already planning to make. That happy accident became this recipe, and I’ve made it more times than I can count since.
It’s dense in the best way, faintly sweet, and it makes your whole house smell like autumn decided to move in permanently.
Why You’ll Love This Gluten-Free Apple Cider Loaf
- One bowl, minimal cleanup — you don’t need a stand mixer or three bowls dirtying your sink.
- No weird gluten-free aftertaste — the reduced cider and applesauce keep it moist, not gritty or gummy.
- Freezer-friendly — slice it, wrap it, and you’ve got breakfast for weeks.
- Naturally sweetened enough — you’re not dumping in two cups of sugar to mask anything.
- Crowd-pleaser at potlucks — nobody guesses it’s gluten-free until you tell them.
Ingredients You’ll Need
For the cider reduction:
- 2 cups apple cider (not apple juice — cider has more body and tartness)
For the dry ingredients:
- 2 cups gluten-free all-purpose flour (I use a blend with xanthan gum already in it — Bob’s Red Mill 1-to-1 works great)
- 1 teaspoon baking soda
- 1/2 teaspoon baking powder
- 1 teaspoon ground cinnamon
- 1/2 teaspoon ground nutmeg
- 1/4 teaspoon ground cloves
- 1/2 teaspoon salt
For the wet ingredients:
- 2 large eggs, room temperature
- 1/2 cup unsalted butter, melted and slightly cooled (or coconut oil for dairy-free)
- 3/4 cup light brown sugar, packed
- 1/2 cup unsweetened applesauce
- 1 teaspoon vanilla extract
- 1 medium apple, peeled and diced small (Honeycrisp or Granny Smith both work well)
Optional topping:
- 2 tablespoons turbinado sugar for sprinkling on top before baking

Step-by-Step Instructions
Step 1: Reduce the cider (15-20 minutes)
Pour the apple cider into a small saucepan and bring it to a gentle boil over medium heat. Let it simmer, uncovered, until it reduces down to about 1/2 cup. It should look syrupy and smell intensely of apples. Set it aside to cool while you prep everything else — pouring hot syrup into eggs will scramble them, and nobody wants that.
Step 2: Preheat and prep (5 minutes)
Preheat your oven to 350°F. Grease a 9×5-inch loaf pan and line it with parchment paper, leaving some overhang on the sides so you can lift the loaf out easily later.
Step 3: Mix the dry ingredients (2 minutes)
In a medium bowl, whisk together the gluten-free flour, baking soda, baking powder, cinnamon, nutmeg, cloves, and salt. Whisking now instead of just stirring later helps avoid pockets of baking soda that taste metallic and bitter.
Step 4: Mix the wet ingredients (5 minutes)
In a large bowl, whisk the eggs and brown sugar together until it looks a little lighter in color, about a minute. Add the melted butter, applesauce, vanilla, and your cooled cider reduction. Whisk until smooth.
Step 5: Combine (2-3 minutes)
Add the dry ingredients to the wet ingredients in two batches, folding gently with a spatula. Stop as soon as you don’t see streaks of flour. Gluten-free batter doesn’t need the same gentle touch as wheat batter since there’s no gluten to overdevelop, but overmixing can still make it gummy.
Step 6: Fold in the apples
Gently fold in your diced apple pieces. The batter will be thick — more like a muffin batter than a pourable cake batter. That’s exactly right.
Step 7: Bake (50-60 minutes)
Pour the batter into your prepared pan and smooth the top with your spatula. Sprinkle turbinado sugar over the top if using. Bake for 50 to 60 minutes, until a toothpick inserted in the center comes out clean or with just a few moist crumbs. The top should be deep golden brown and slightly domed.
Step 8: Cool completely (at least 1 hour)
Let the loaf cool in the pan for 15 minutes, then use the parchment overhang to lift it onto a wire rack. I know it’s tempting to slice it warm, but gluten-free loaves need this cooling time to fully set their structure. Cut it too early, and you’ll get a gummy slice.
Pro Tips & Tricks
Don’t skip the cider reduction. I tried using regular cider straight from the jug once to save time, and the loaf turned out bland and slightly too wet. The reduction concentrates the apple flavor into something that actually tastes like fall.
Weigh your flour if you can. Gluten-free flour blends pack differently than wheat flour, and scooping straight from the bag can add way too much. A kitchen scale takes the guesswork out completely.
Toss the diced apple in a spoonful of your dry mix before folding it in. This one I discovered by accident when I was running low on bowls. It keeps the apple pieces from all sinking to the bottom.
Store it right. Once fully cooled, wrap the loaf tightly in plastic wrap or store it in an airtight container at room temperature for up to 3 days. In the fridge, it’ll last about a week.
Make it ahead. This loaf actually tastes better on day two, once the spices have had time to settle in. If you’re serving it for a gathering, bake it the day before.
Variations & Substitutions
Dairy-free version: Swap the butter for melted coconut oil or a plant-based butter stick. I’ve done both and honestly can’t taste much difference.
Nutty crunch version: Fold in 1/2 cup chopped walnuts or pecans along with the apples for some texture contrast against the soft crumb.
Maple-cider version: Replace the brown sugar with the same amount of maple sugar, or swap 1/4 cup of the brown sugar for maple syrup (reduce the applesauce slightly to keep the batter from getting too wet). It leans more into that cozy, syrupy flavor.
Serving Suggestions
This loaf is happiest served slightly warm with a smear of salted butter melting into it. For breakfast, pair it with coffee or a chai latte — the spices practically shake hands with each other.
It also makes a great addition to a fall brunch spread, sitting alongside a cheese board or next to a bowl of yogurt and granola. I’ve brought it to Thanksgiving as a lighter alternative to pie, and it disappeared just as fast.
FAQs
Can I use apple juice instead of apple cider?
You can, but the flavor will be noticeably less complex. Apple cider is unfiltered and has more of that tart, deep apple flavor that holds up well after reducing. Juice tends to taste flatter and sweeter once reduced.
How do I store leftovers?
Keep the loaf wrapped tightly at room temperature for up to 3 days, or in the fridge for up to a week. Bring refrigerated slices to room temperature or warm them slightly before eating for the best texture.
Can I freeze this loaf?
Yes, and it freezes beautifully. Slice it first, wrap individual slices in plastic wrap, then place them in a freezer bag. They’ll keep for up to 3 months. Thaw at room temperature or pop a slice in the toaster for a quick warm-up.
My loaf came out gummy in the middle. What happened?
This usually means it needed a few more minutes in the oven, or it was sliced before fully cooling. Gluten-free batters continue to set as they cool, so patience really does pay off here.
Can I make this into muffins instead?
Absolutely. Divide the batter among a lined 12-cup muffin tin and bake at 350°F for 20 to 25 minutes, checking with a toothpick around the 20-minute mark.
What gluten-free flour blend works best?
I’ve had the most consistent results with Bob’s Red Mill 1-to-1 Baking Flour since it already includes xanthan gum. If your blend doesn’t have xanthan gum built in, add 1/2 teaspoon to the dry ingredients.
Read More Recipes:
- Warm Spiced Apple Cider Coffee Cake
- Easy Apple Cider Donut Bread
- Homemade Classic Apple Cider Cake
- Apple Cider Glazed Loaf Cake
- Easy Pear Tart with Goat Cheese and Honey
- Brown Butter Texas Sheet Cake
Final Thoughts
This loaf has become one of those recipes I make without needing to check the instructions anymore, and I hope it earns a spot in your regular rotation too. There’s something about the smell of reducing cider on the stove that just makes a kitchen feel like home.
If you give it a try, I’d love to hear how it turns out. Drop a comment below and let me know what you paired it with, or if you tried one of the variations. Happy baking.


Gluten-Free Apple Cider Loaf
Ingredients
Method
- Preheat the oven to 350°F (175°C) and grease a 9×5-inch loaf pan or line it with parchment paper.
- Whisk together gluten-free flour, baking powder, baking soda, salt, cinnamon, and nutmeg.
- Beat the softened butter, granulated sugar, and brown sugar until light and fluffy.
- Add the eggs one at a time, mixing well after each addition.
- Stir in the vanilla extract and applesauce.
- Add the dry ingredients alternately with the apple cider, mixing just until the batter is smooth.
- Pour the batter into the prepared loaf pan and smooth the top.
- Bake for 45–50 minutes, or until a toothpick inserted into the center comes out clean.
- Cool the loaf in the pan for 10–15 minutes, then transfer it to a wire rack to cool completely.
- For the glaze, whisk powdered sugar, apple cider, cinnamon, and vanilla until smooth.
- Drizzle the glaze over the completely cooled loaf.
- Let the glaze set for a few minutes before slicing and serving.
Notes
- Use a certified gluten-free flour blend if the loaf needs to be strictly gluten-free.
- Choose a gluten-free flour blend that already contains xanthan gum; otherwise, add it according to the manufacturer's instructions.
- Fresh apple cider provides the best flavor and aroma.
- Do not overmix the batter because gluten-free baked goods can become dense when overworked.
- Let the loaf cool completely before glazing for the cleanest finish.
- Store covered at room temperature for up to 2 days or refrigerate for up to 5 days.
- Freeze the unglazed loaf tightly wrapped for up to 2 months.
DID YOU MAKE THIS EASY RECIPE?
If you have, then share it with us by sending a photo. We’re excited to see what you've made:-)Printable Recipe Card
Want just the essential recipe details without scrolling through the article? Get our printable recipe card with just the ingredients and instructions.


