
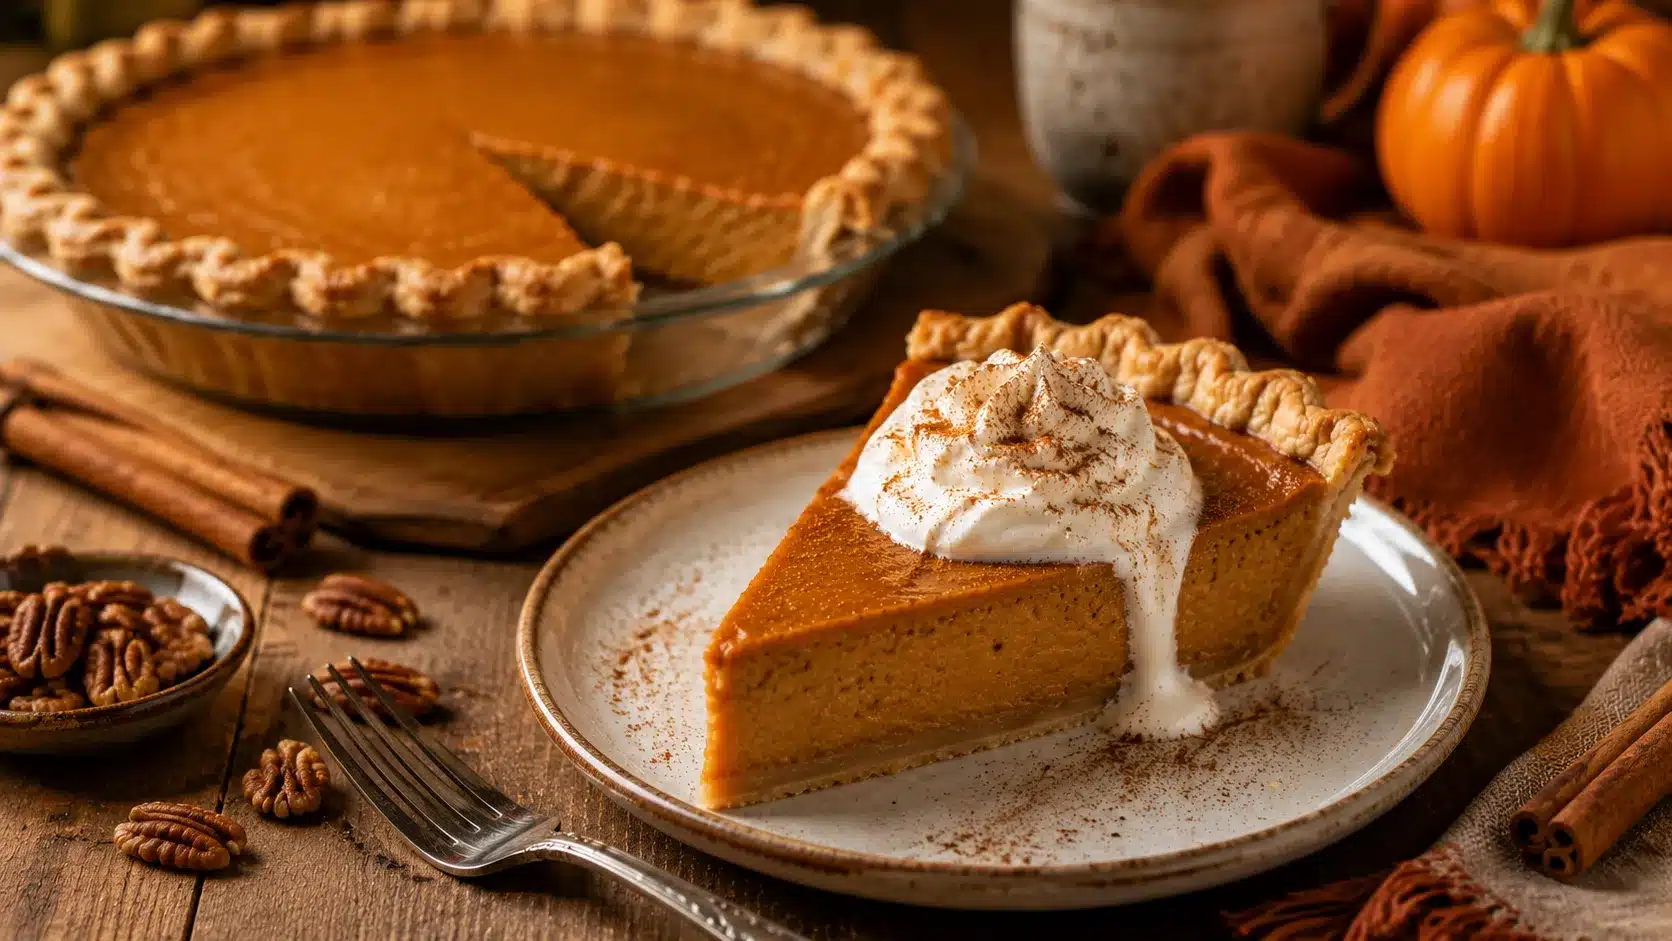
Easy Pumpkin Pie Delight Recipe
The first time I made pumpkin pie from scratch, I burned the crust, undercooked the filling, and cried a little in my kitchen at 11 p.m. the night before Thanksgiving. My mother-in-law was arriving in ten hours. I remember standing over that sad, jiggly, scorched-edge pie thinking, “This is how it ends.”
It didn’t end there, obviously. I scraped the crust edges, hid the damage under a giant cloud of whipped cream, and nobody noticed a thing. That pie disappeared before the turkey did. Six years and probably eighty pies later, I’ve turned that panicked first attempt into the recipe I’m sharing with you today — the one my sister now requests instead of a birthday cake.
I call it Pumpkin Pie Delight because “delight” is really the only word for that first bite: cool whipped cream giving way to warm, spiced custard, sitting on a crust that shatters just slightly before it goes soft in your mouth. It’s not fancy. It’s not trendy. It’s just really, really good pie.
Why You’ll Love This Recipe
- It’s genuinely foolproof once you know the two tricks — no water bath, no fancy equipment, just a mixing bowl and a whisk.
- One bowl for the filling. I’m not exaggerating. Dump, whisk, pour.
- Make-ahead friendly — it actually tastes better the next day, so it’s perfect for holiday prep.
- Budget-friendly — under $10 for the whole pie using pantry staples and one can of pumpkin.
- Crowd-pleaser every single time — I have never once brought this to a potluck and come home with leftovers.

Ingredients You’ll Need
For the crust
- 1 unbaked 9-inch pie crust, homemade or store-bought (Pillsbury refrigerated crust works great if you’re short on time)
For the pumpkin filling
- 1 can (15 oz) pure pumpkin puree — not pumpkin pie filling, which is already sweetened and spiced
- 3/4 cup granulated sugar
- 1/2 teaspoon salt
- 1 teaspoon ground cinnamon
- 1/2 teaspoon ground ginger
- 1/4 teaspoon ground cloves
- 1/8 teaspoon ground nutmeg (fresh-grated if you have it — it makes a real difference)
- 2 large eggs, room temperature
- 1 can (12 oz) evaporated milk (not sweetened condensed milk — different thing entirely, learned that one the hard way)
For the topping
- 1 cup heavy whipping cream
- 2 tablespoons powdered sugar
- 1/2 teaspoon vanilla extract
- A pinch of cinnamon for dusting
- Optional: caramel drizzle, chopped toasted pecans
Swap note: No evaporated milk on hand? Full-fat coconut milk works in a pinch and adds a subtle, not unpleasant coconut warmth. Out of cloves? Just bump the cinnamon and ginger slightly — the pie will still taste like fall.
Step-by-Step Instructions
- Preheat your oven to 425°F (218°C). This high initial heat is what sets the crust before it has a chance to get soggy. Don’t skip this step or shortcut the temperature.
- Fit your pie crust into a 9-inch pie dish. Crimp the edges however makes you happy — fork marks, fingers pinched, doesn’t matter. Prick the bottom a few times with a fork so it doesn’t puff up. Pop it in the fridge while you make the filling; a cold crust holds its shape better in the oven. 5 minutes.
- In a large mixing bowl, whisk the pumpkin puree, sugar, salt, cinnamon, ginger, cloves, and nutmeg together until fully combined and no dry sugar streaks remain. 2 minutes.
- Whisk in the eggs one at a time, mixing well after each. The batter should look like a smooth, deep orange pudding.
- Slowly pour in the evaporated milk while whisking. Go slow here — dumping it all at once tends to leave little pockets of unmixed milk. The final batter should be pourable, silky, and roughly the consistency of heavy cream. 3 minutes.
- Pull your chilled crust from the fridge and pour the filling in. Fill it right up close to the top edge — this pie doesn’t rise much, so don’t be shy.
- Bake at 425°F for 15 minutes, then, without opening the oven if you can help it, reduce the temperature to 350°F (175°C) and continue baking for 40–50 minutes.
- Check for doneness with the jiggle test, not the toothpick test. Gently nudge the pie dish — the outer two inches should look set, while the very center still wobbles slightly like Jell-O. It’ll finish setting as it cools. Pulling it too early means a runny center; too late means cracks.
- Cool the pie on a wire rack for at least 2 hours at room temperature, then refrigerate for another 2 hours minimum before slicing. I know waiting is the hardest part. Do it anyway — a warm pumpkin pie slices like soup.
- Whip the cream with the powdered sugar and vanilla using a hand mixer or stand mixer with the whisk attachment, until soft peaks form (about 3–4 minutes). Don’t overwhip or you’ll end up with sweet butter — I’ve done that too.
- Top and serve. Dollop or pipe the whipped cream onto individual slices right before serving, dust with cinnamon, and drizzle with caramel if you’re feeling extra.

Pro Tips & Tricks
- The jiggle test beats the toothpick test every time. A toothpick will come out looking “wet” from custard pies even when they’re perfectly done — that’s normal for custard, not a sign it needs more time.
- Room-temperature eggs blend smoother. Cold eggs straight from the fridge can make the filling slightly lumpy. Set them out 20 minutes before baking.
- Make it a full day ahead. Pumpkin pie actually improves overnight in the fridge as the spices settle in — this is genuinely my favorite make-ahead holiday dessert.
- If the edges start browning too fast, loosely tent them with foil or a pie shield around the 20-minute mark.
- Store leftovers covered in the fridge for up to 4 days. Skip the counter — custard pies need to stay chilled for food safety.
Variations & Substitutions
If you’re baking for a mixed crowd, a gluten-free crust swap works beautifully here — just use your favorite gluten-free pie crust blend or an almond flour crust; the filling itself is naturally gluten-free.
For a dairy-free or vegan version, swap the evaporated milk for full-fat coconut milk, replace the eggs with a flax egg (1 tablespoon ground flaxseed plus 3 tablespoons water per egg, rested 5 minutes), and top with coconut whipped cream instead of dairy.
Want it spiced up? Add a tablespoon of bourbon to the filling, or double the ginger and add a pinch of black pepper — sounds strange, tastes incredible, and nobody can ever guess what makes it taste “different but good.”

Serving Suggestions
This pie belongs at the center of a Thanksgiving table, but honestly, I make it in July too — it’s just good. Serve it slightly chilled, straight from the fridge, alongside a scoop of vanilla ice cream if you want to go full dessert-table mode.
A hot cup of coffee or spiced chai cuts through the sweetness perfectly. If you’re serving a crowd, slice it while cold for cleaner cuts, then let individual slices sit out for 10 minutes before eating so it’s not fridge-cold.
FAQs
Can I use fresh pumpkin instead of canned?
Yes, though I’ll be honest — I almost always use canned because the texture and moisture content are so consistent. If you go fresh, roast and puree a sugar or pie pumpkin, then strain it through cheesecloth to remove excess water, or your filling will turn out watery.
Can I make this pie ahead of time?
Absolutely, and I’d actually recommend it. Bake it up to 2 days ahead, keep it covered in the fridge, and add the whipped cream topping right before serving.
Why did my pie crack on top?
Cracking almost always means it baked a touch too long or the oven ran hot. Pull it while the center still has a gentle jiggle — it firms up as it cools. A water bath can also help if cracking is a recurring issue for you, though I’ve never needed one with this recipe.
Can I freeze pumpkin pie?
Yes, the baked and cooled pie (without whipped cream) freezes well for up to a month. Wrap it tightly in plastic wrap and foil, then thaw overnight in the fridge before topping and serving.
What’s the difference between pumpkin puree and pumpkin pie filling?
Pumpkin puree is just pure, unsweetened pumpkin. Pumpkin pie filling already has sugar and spices mixed in, which will throw off this recipe’s balance if you swap them by accident — I’ve grabbed the wrong can more than once at 10 p.m. before a holiday, so double-check the label.
My filling looks curdled or lumpy after baking. What went wrong?
This usually happens from overbaking or an oven running too hot, which causes the eggs to separate slightly. Keep an eye on it after the 35-minute mark and pull it as soon as the jiggle test looks right.
Read More Recipes:
- Brown Butter Pumpkin Snack Cake
- Easy Pumpkin Oatmeal Snack Cake
- Easy Vegan Pumpkin Snack Cake Recipe
- Pumpkin Snack Cake
- Apple Crisp Cheesecake with Oat Crumble
Final Thoughts
This pie has been through a lot of Thanksgivings, a few disasters, and a whole lot of trial and error in my kitchen. If your first attempt cracks or the edges get a little too brown, don’t worry — a big cloud of whipped cream forgives almost everything, and nobody’s going to complain about extra whipped cream anyway.
Give it a try this weekend, even if the holidays feel far off. I’d love to hear how yours turns out — drop a comment and let me know if you tried any of the variations, or if you found your own happy accident along the way. Mine was the bourbon. Yours might be something even better.
Printable Recipe Card
Want just the essential recipe details without scrolling through the article? Get our printable recipe card with just the ingredients and instructions.


